Note: Only label sets originally created in the Check-In Suite Admin Console can be uploaded for use and editing. Label sets created outside of Check-In Suite will not function properly and can lead to an error with the Label Set
drop-down menu.
 In
the Label Sets area of the Admin Console section in Check-In Suite, you can manage, edit, and create name tags for your Check-In Kiosk. Each Label Set contains at least one label.
Below are the various options for customizing the format of labels.
In
the Label Sets area of the Admin Console section in Check-In Suite, you can manage, edit, and create name tags for your Check-In Kiosk. Each Label Set contains at least one label.
Below are the various options for customizing the format of labels.
Dimensions
There are four basic label dimensions available:
- 4 x 2 Zebra
- 3 x 2 Zebra
- 4 x 2 Dymo
- 3 x 2 Dymo
Choose the largest size above that is smaller than your physical label. Otherwise, the labels will overflow your physical labels and extras will be printed.
Working with Labels
Labels are clustered according to the currently selected view. When clustered by Group Role Type, labels are sorted into Group Participant, Leader, Servant, and RSVP categories. From this view, click on the "i" icon will display Group Mapping information.
When clustered instead by Group Mapping, labels are sorted into Group categories showing which labels will print for which Groups. From this view, click on a ticket or person icon will display Group Role Type information.
A history of changes is recorded beneath the label preview. If the label name or group mappings are changed, the previous values are stored in the entry. Changes to the label design create entries with the currently logged-in user's name and date, specific
values are not stored. History will not be included during export.
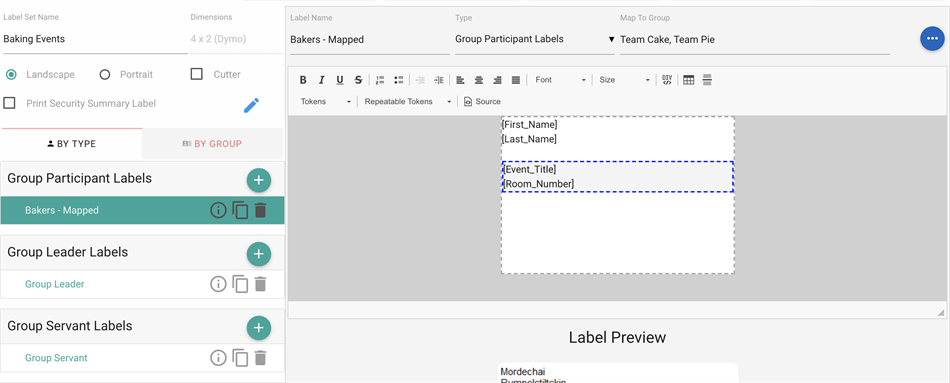
Tokens
When designing your labels, you'll see a preview of the label so you can review the populated content. This preview is a content preview, not a format preview. If you want to preview/text formatting, print some text labels with various name lengths, Group and Event names, attributes, etc so you can see them in action. You can "Print to PDF" or send to a label printer.
The following tokens are available for labels:
- First Name [First_Name]: From the Contact First Name field.
- Last Name [Last_Name]: From the Contact Last Name field.
- Nickname [Nickname]: From the Contact's Nickname field.
- Participant ID [Participant_ID]: From the ID of the Contact's Participant record.
- Call Number [Call_Number]: From the Household's Family_Call_Number field (This value can be unique or the same per family based on the Call Number Type Configuration Setting. This value is mainly used by churches who have
a digital display at the front of their sanctuary to "call out" parents whose children need them.)
- Parents [Parents]: The First_Name (only) of the parents (HOH) of the Household the Participant is checked-in from (as Participant might appear in their primary Household or an Other Household if Household Type = Non-Custodial Parent).
- Parents Full Name [Parent_Full_Name] : The First_Name and Last_Name of the parents (HOH) of the Household the Participant is checked-in from (as Participant might appear in their primary Household or an Other Household if Household Type = Non-Custodial Parent).
- Parent Mobile Phone [Parent_Mobile_Phone]: A comma-delimited list of the mobile phones of the parents (HOH) of the Household the Participant is checked in from (as the Participant might appear in their primary Household or an Other Household if Household Type = Non-Custodial Parent).
- Date of Birth [Date_of_Birth]: From the Contact's Date_of_Birth field.
- Care Note [Care_Note]: Content varies based on the content of the Care Note added
by the person checking in. If this token is present on an applicable label, the Participant checking in will be prompted to enter a Care Note before labels print.
- Date [Date]: The local date based on the kiosk from which they checked in.
- Time [Time]: The local time based on the kiosk from which they checked in.
- ID Card [ID_Card]: The value from the Contact's ID Card field.
- Security Code [Security_Code]: Varies as calculated by Check‐In. This value is uniquely generated by the system for each print job. However, it will be the same for each label within each print job (i.e., for a family
who checks in three kids at the same time, all three kids will have the same security code). The value printed is not stored in MinistryPlatform. This is the code that churches use for security primarily with children (e.g. the parent's pick-up
tag should match the child's name tag in order to release the child to the parent). If this token is present on an applicable label, the label is considered a "secure" label.
- Birthday [Birthday]: If the attendee's date of
birth is within the last 7 days or the next 7 days, a birthday cake icon
displays on the label beside their name. This helps you know about recent or upcoming birthdays!
Repeating Tokens
A "repeating" token means that the system will "repeat" the content of the token for each Event checked into all on the same tag. For example, if you check into the Communion Setup Event and the Sunday 9 am Worship Service Event at the same time, you
will get one label set, but the tags will list both Events, both Group Roles, etc. for any repeating tokens used and applicable.
- In the label editor, the repeating tokens will appear in a dotted box (Event = Blue, Options = Red, Attributes = Green). The dotted boxes will not print on the label but are for the visual organization as you design the label.
- Repeating Event tokens will stack horizontally when printed on the tag. Repeating Attribute tokens will fill left to right when printed on the tag.
- Note: Repeating Tokens will be added at the end of your label. You may need to edit the source code to correctly position the Token. Adjust the font-size and line-height style attribute values to fit everything in the label. Note
that the maximum height of the repeat-event block is 60px.
The following repeating tokens are available for labels:
- Event
- Event Title [Event_Title]: From the Event's Event_Title field.
- Role Title [Role_Title]: From the Group Participant's Role_Title field. For this to show, the Group must be associated with the Event on the Rooms & Group sub-page and the Participant must be in the Group.
- Group Name
[Group_Name]: From the Group's Group_Name field.
- Room Name
[Room_Name]: From the Room Name of the Room checked into. For this to show, the Event must be associated with a Room on the Rooms & Groups sub-page.
- Room Number
[Room_Number]: From the Room Number of the room checked into. For this to show, the Event must be associated with a Room on the Rooms & Groups sub-page.
- Group
- Group Participant Notes
[Group_Participant_Notes]: From the Group Participant's Group_Participant_Notes field.
- Option
(For these tokens to show, the Participant must have registered for the Event so as to create a related Invoice with Products and Options chosen. Typically, this would be through the Portal
or the Add a Payment Tool.)
- Option Group [Option_Group]: From the Event Participant's Invoice Detail's Option Price's Option_Group field.
- Option Title [Option_Title]: From the Event Participant's Invoice Detail's Option Price's Option_Title field.
- Option Quantity
[Option_Qty]: From the Event Participant's Invoice Detail's Item_Quantity field.
- Option Note
[Option_Note]: From the Event Participant's Invoice Detail's Item_Note field.
- Attribute: For these tokens to show, the Attribute must be assigned to the Participant and the Attribute must have an Attribute Type of Personal Characteristics.
- Attribute Name [Attribute_Name]: From the Contact Attribute's Attribute field.
- Attribute Icon [Attribute_Icon]: From the Attribute's Icon field. See notes below for how to customize the icon.
- Attribute Note [Attribute_Note]: From the Contact Attribute's Notes field.
Notes About Attributes
- For an Attribute to print on a label, the Attribute must:
- Each Attribute can have an icon that can print on the label to represent that Attribute visually. You can use icons from the Ico-Moon Free icon library or Font Awesome icon library. If you use Font Awesome, note that only v. 5.14.0 is supported in
Solid (fas) or Regular (far). To set an icon:
- Go to the
- Ico-Moon Free icon library and find the icon name by hovering over the image.
- Font Awesome icon library and tap the desired icon. Tap the code to copy it.
- Open the Attribute record.
- Edit.
- In the Icon field, enter the icon name.
- If you're using Ico-Moon, enter the name (for example, Hipster)
- If you're using Font Awesome, paste the code you copied (for example, fas fa-bug)
- Save.
- For attributes to spread horizontally:
- Enter the attribute name and note on the same line.
- [Attribute_Name] [Attribute_Note]
- Adjust the repeat class max height.
- Ex. style="height:165px; max-height:165px;"
- You can include any combination of the Attribute tokens on a label. For example, you could include Attribute Icon and Attribute Note to print an icon of a hospital symbol and a list of all medications. Or, you could include the Attribute Icon to print
just an icon of a puzzle piece to represent Autism without additional words/description. However, note that the tokens chosen apply to all "applicable" Attributes (see above).
Security Summary Label
The Security Summary Label can be configured per Label Set. To use:
- Check the box for Print Security Summary Label.
- Click the pencil icon next to this label.
- Add the desired tokens and formatting (same as any other label in the label set).
- Click Save (under the label) to save the label.
- Make other changes to the label set, if needed.
- Click Save (at the top by the Label Set name) to save the label set.
When toggled on, a single additional label will print any time a secure label is included in a print job. Only one Security Summary Label will be printed per print job, no matter how many secure labels are printed. In other words, one parent pick-up label
could be printed no matter how many children are checked-in.
When designing Security Summary Labels, a limited set of tokens are available. In order for the Security Summary Label to print, at least one label in the Label Set should be a secure label. A secure label is indicated by the lock icon and contains
the security code token (see above).
Logos & Images
See Image Optimization
Formatting
You can use HTML to further format your labels if desired. Simply click the HTML Source View button to switch the label editor into HTML editor so you can edit the HTML directly. When done, click the HTML Source View button again to switch back to
the WYSIWYG (what you see is what you get) editor view.
Absolute Positioning
Absolute positioning can be used for items within a label if the label has a relative position.
If an item is positioned absolutely, the position is calculated from its container. The default container is the body. This means if you just use an absolute position (and nothing else), a stack of three labels will have all of the absolutely positioned
items in the same place for the stack, not in the same place for the individual labels.
If a container element is styled as position:relative, then all of its children are positioned relative to the container element. This can be used in conjunction with position:absolute to control the position absolutely within the container. This is how
you should use absolute for items within a label.
Tips & Tricks
- Remember that the preview is a content preview, not a format preview. Print labels to preview/test formatting. You can "Print to PDF" or send to a label printer.
- Tables are very helpful and are highly recommended to help you to use all the available space.
- Be exact in your height and width. The printers all use 96dpi so it is easy to figure out how many pixels you have to use (i.e. 1 inch = 96 px). We recommended an 8px buffer for the edges.
- Images must be black and white, small, and in base64. See the "Logos and Images" section above.
- If you are unable to see the full content of your label in the Editor you may have an image that has too much white space, or is not in base 64. See the "Logos and Images" section above for more information.
- Be mindful of possible wrapping pushing down other content. We recommend you use set heights and widths and set overflow to hidden.
- Test, test, test! There are a lot of different scenarios with Check-In Kiosk. Make sure to test them all!
