Hardware Requirements
For the optimal results, run Check-In Suite on a workstation that meets the following requirements:
- 2+ Gigs of RAM
- 2+ Ghz
- One of the following browsers installed:
- Latest version of Google Chrome (regular, not Canary)
- Latest version of Mozilla Firefox (regular, not ESR)
- Latest version of Microsoft Edge
- Latest version of Macintosh Safari
*Important* If printing, the Check-In Suite Print Service requires installation on a Windows machine. Check-In Suite can be used on other systems; however, for printing label sets, the local machine or the machine with the remote
printer must be a Windows machine. Bluetooth printing is not supported.
There is no required Minimum Screen Resolution.
Printers
We know printers can be picky! But any printer will work as long as it uses the print driver we support. We'll list some supported printers below, but if you have a different printer that is working with a supported print driver, you're good to go!
Supported Print Drivers
- Zebra Print Drivers
- ZDesigner v. 8 Driver for Windows (Driver Version: 8.6.4.23827)
- ZDesigner v. 5 Driver for Windows (Driver Version: 5.1.16.7398)
- Dymo Print Drivers
- DCD macOS v1.4.2
- DCD Windows v1.4.2
- Brother Print Drivers
- Windows - 1.10.0a Brother Driver
- Windows - 1.7.0b Brother Driver
Non-Exhaustive List of Supported Printers
- Zebra Models
- ZD200 Series (ZD220d/ZD230d, ZD220t/ZD230t)
- ZD410
- ZD420d
- GK420d
- GX420d
- Dymo Models
- Label Writer 400 (discontinued, but still supported by Dymo)
- Label Writer 450
- Label Writer 450 Turbo
- Label Writer 450 Twin Turbo
- Label Writer 500 (replaces Label Writer 400)
- Brother Models
- QL-1100
- QL-1110NWB
- QL-800
- QL-800W
- QL-810W
- QL-820NWB
We strongly encourage hard-wiring your label printers to your network and/or the local machine. WiFi printing is not reliable. The label printers' drivers and firmware were not designed or tested by the manufacturers with the load a weekend
service check-in event creates. Churches have much more reliable print experiences when printers are hard-wired.
If you use one of those brands, but a different model and have printed labels via Check-In Suite successfully, please let us know so that we can review that specific model and if possible, add it to the supported list.
If you have another label printer brand that you would like to see supported, please email Support with your suggestion.
Printer Setup Notes
- Zebra brand label printers with cutters are supported; however, due to Zebra driver limitations, in order to cut, these printers require that the Print Service run on a machine with Windows 10 or 11 (print server or local machine). Also, they require
additional configuration in Printer Defaults and Label Sets. The cutter will cut the labels at the end of the print job (not after every label).
- Minimum label size for Check-In Kiosk is 3x2. Default label sizes are 3x2 and 4x2. If the label size is substantially different, the labels will likely need to be adjusted to fit properly.
- You can run Check-In Suite on an iPad or tablet. If you need to print name tags, printing requires a remote printer on a Windows machine. Bluetooth printing is not supported.
- Printers should be physically plugged into a Windows 10 or 11 system using USB or Ethernet for best performance/results. Children's check-in is a high-volume operation and it's important to have fast and stable bandwidth for printing.
See these articles for setting up and mapping printers:
Kiosk Setup
Once the station is ready to be used, you can configure your Check-In Kiosk Settings for each specific station. This is where you can set the desired Events, themes, and labels sets. You can also print test labels to make sure the printer is working as expected.
If you are using a Windows 10 or 11 touchscreen device, you might want to disable the "pinch to zoom" feature (steps here).
Auto URL
To simplify the steps needed to use a station for Check-In Kiosk each week, take advantage of the Auto URL feature. This creates a link that can be put on the station desktop that launches Check-In Kiosk with all the desired settings preset. See
Kiosk Settings for details.
Special Firefox Note: if you are using a Check-In Suite Auto URL as your Homepage in a Firefox browser, each pipe '|' character in the contents of the Auto URL will cause a new Firefox tab to open. Replacing the '|' character
with '%7c' has proven as a viable workaround solution to correctly launch the Auto URL for any churches who desire to save Check-In Suite as their Homepage in this browser. For more information related to this, please visit
Firefox Support.
Barcode Scanner
You can optionally use a barcode scanner in conjunction with Check-In Kiosk or the Roll Scan Attendance Tool. This barcode scanner can read the barcode from an ID card given to each family or participant or from the Selected Group Roll Scan Roster
report.
Note: Using barcodes with Check-In Suite takes additional setup and ongoing maintenance. All ID card values should be numerical values only. Many churches find it simpler to use the standard search by phone number approach that comes standard
with Check-In Suite.
If you choose to use a barcode scanner, a SPoC must complete a one-time initial setup:
- a standard Code 39 Barcode Reader (USB) and install it on the SQL server.
- Install the barcode font on the SQL server and workstation. The font either comes with your barcode scanner, or you can download it by searching online for IDAutomationHC39M Free Version.
- Additionally, you must set up the participant's Contact records appropriately by adding an appropriate value to the ID Card field with the value of the barcode. This must be done on an ongoing basis to ensure the appropriate
people are able to check in using a barcode. Once a Contact record has an ID Card value, that value may be entered into check-in, either via the keyboard or a barcode scanner. Whether the individual or the Household for that Contact will be
returned, depends on the ID Card Behavior selected in the Check-In Kiosk Settings.
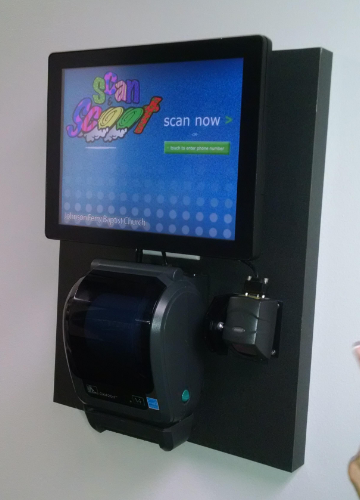
QR Code Scanner
If you are using Online Giving's Church App or PocketPlatform App to
generate a pre-check or FastPass QR Code for Check-In Kiosk, you simply need a 2D scanner to decode the QR Code connected to the Check-In station to read the QR Code and convert it to a specially formatted search string on the Search page of Check-In Kiosk.
No specific brand/model is required. No special font is required. No additional Contact or Participant configuration is required as the QR Code uses Household, Event, and Participant information already in the Platform as part of setting up Events for check-in.
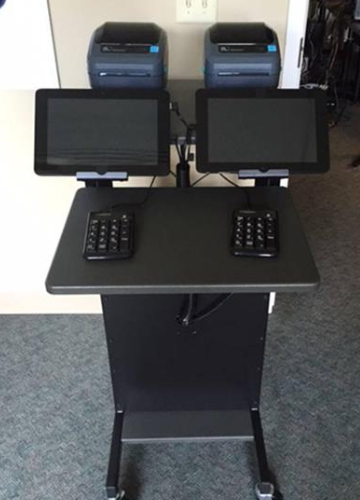
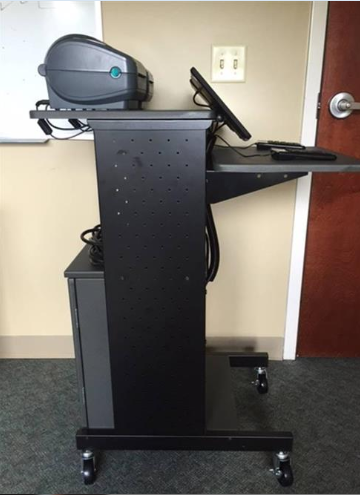
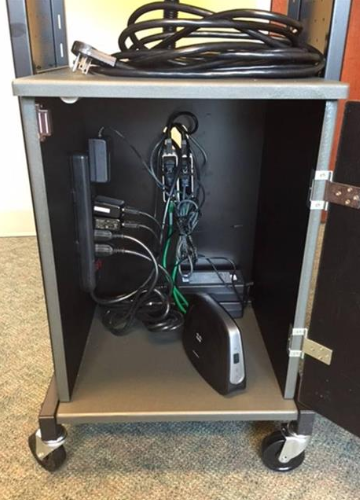
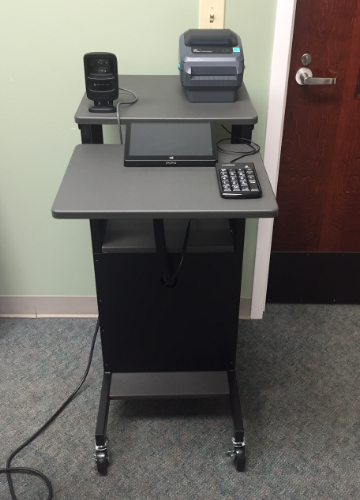
Check-In Kiosk Samples