When a user selects a Participant, they can see the Event, check-in status, age, date of birth, attributes, date of last attendance, and family and authorized households.
Also, from the Participant Details screen, many actions are available to them. These actions depend in part on the individual's current check-in status (if they are checked in, marked present, etc.). Events will stay available for 30 minutes after the Event End time.
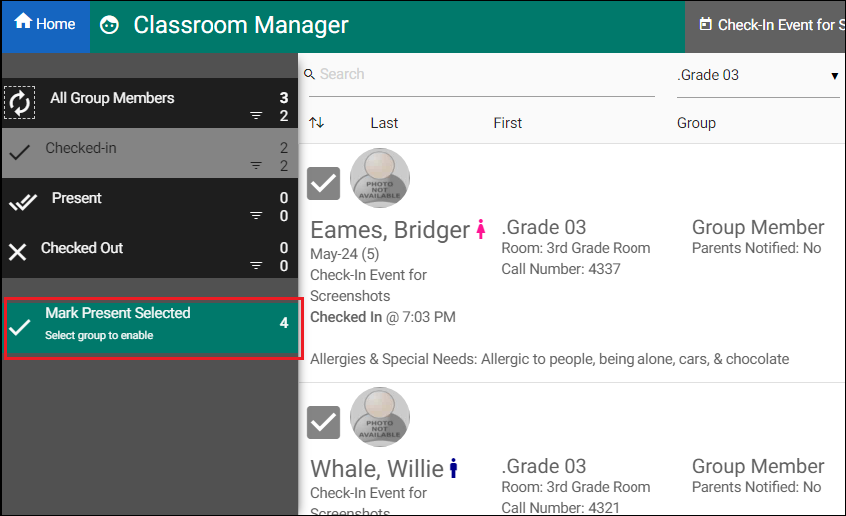
The User can tap this button to confirm that a Participant is physically present in the classroom. It is available if at least one Group is chosen from the Selected Group list and the Participant is checked in but not present, or not checked-in. If the child was not previously checked in, this button performs both actions (checking the Participant into the Event and marking them present).
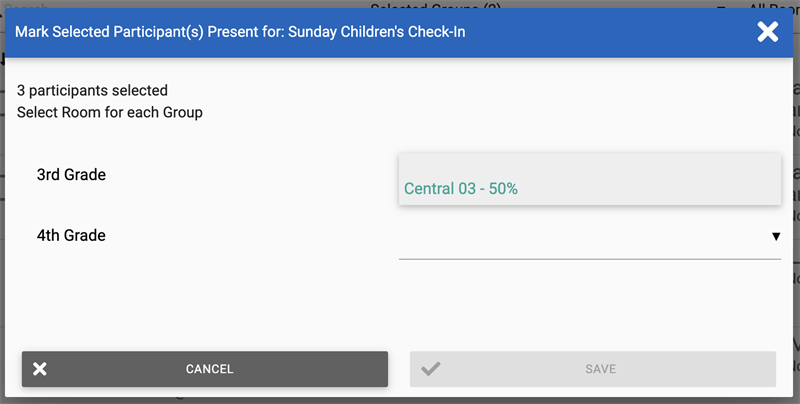
When the classroom attendant or Group Leader launches the Mark Present dialog they are able to specify a Room per Group. If all Participants in a selection belong to the same Group, only one Group will be shown. Only Rooms associated via Room Reservations will appear in each Group's drop-down. Room capacities will update as each Group is assigned.
If needed, you can mark a Participant present who was previously checked out. From the Checked-Out view, open the Participant and click Mark Present. This moves the Participant to the Present view. This also removes the Time Out value and updates the Time In value on the Event Participant record.
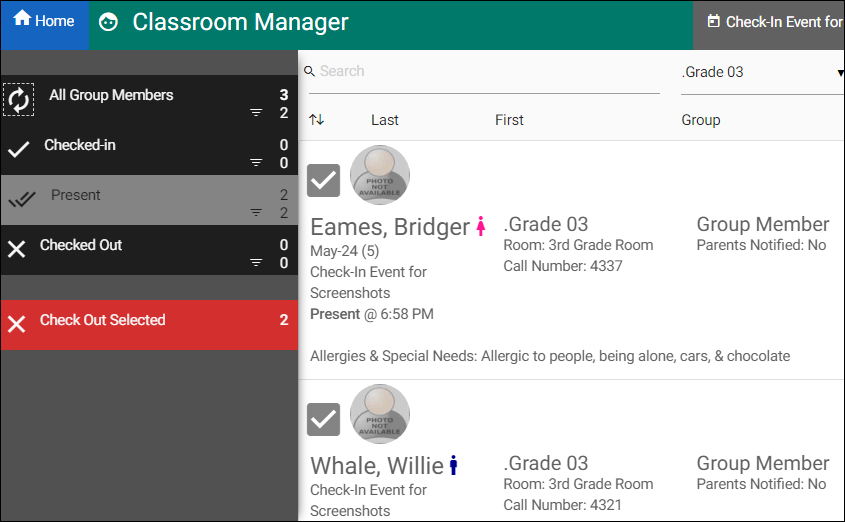
When the Participant leaves (or a parent/guardian comes to pick up the Participant), this button lets the church record that the Participant is no longer at the Event (or for kids, under the church's watch).
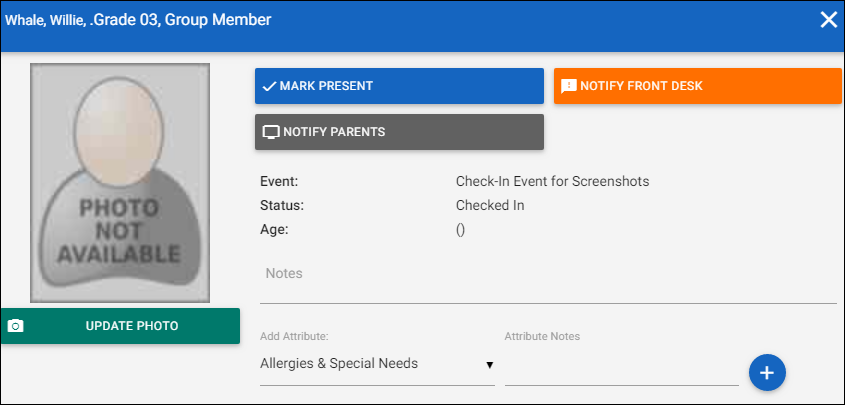
The user can take a photo of the selected Participant, updating their information in MinistryPlatform.
This feature requires a camera device to be present on the workstation. The first time selected, the User will be asked:
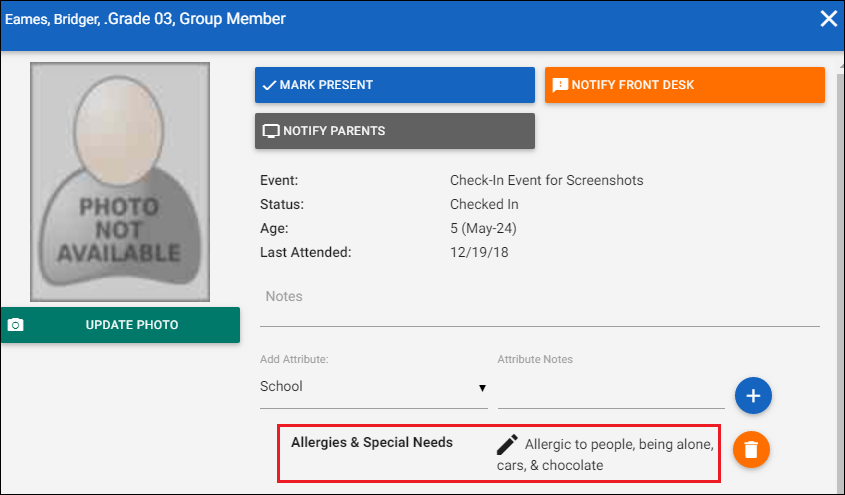
Update the selected Participant's allergy information. Edit an existing Attribute by clicking the pencil icon OR select a new Attribute from the drop-down, add a note and click +Add. Repeat as needed.
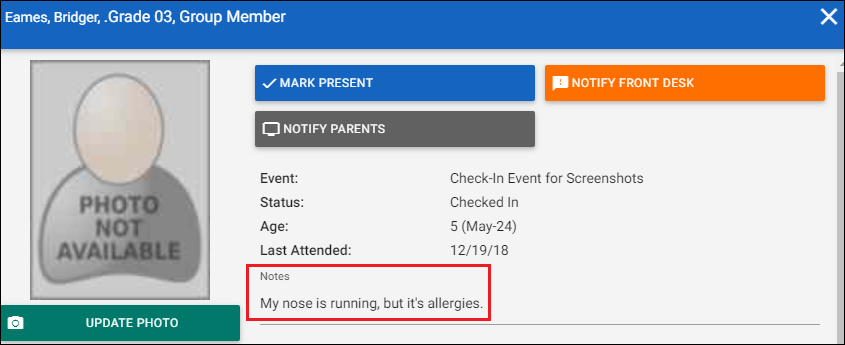
The Notes field is available for adding notes specific to the day that the Group leader might need to keep in mind during the Event. The note can be found on the person's Event Participant record in MinistryPlatform.
This button allows the classroom attendant or Group Leader to notify someone at the "front desk" (for example, the Information Center or Children's Welcome Desk) that a Participant needs to be picked up.

Oftentimes this is a volunteer at the information desk or another central area with access to the paging system inside the service. Clicking this button will send a text to the number set in the CLASSROOMFrontDeskSMSNumber Configuration Setting. To send text messages you'll need to:
The text message will contain the Event Participant's name, Group, and Room. For example, "Smith, Larry needs assistance in Veggie Group Room 234".
Clicking this button sets the Call Parents field to True on the Event Participant record. What this does beyond that is up to each church to create and customize. For example, a church could create a workflow where clicking this button:
This button can be hidden using the CLASSROOM,HideCallParentsButton Configuration Setting.
This section lists the Participant's family members and members of other authorized Households including a picture and if available, Household Position and mobile phone. Other authorized Households are Households set on the Participant's Contact record on the Other Households page with a Household Type of "Shows in Check-in". (Household Types are found in System Lookups/Household Types. If you are missing the type "Shows in Check-in", please add it to your system.) A common use of this is for grandparents, relatives or close friends/neighbors who might be the ones dropping off or picking up the participant besides the parent(s).
Inactive Contacts will not appear in this section.
From this section, if a mobile phone number is available, you'll have the option to send a text to the desired adult family or permitted guardian (the option will not appear for Contacts with a Household Position of: Guest Child, Minor Child, or Company). Texting via Check-in Suite does not reference the Contact record, so it does not prevent texts from being sent to people who have opted out of receiving them. See the configuration information above to make sure you're set up to send a text message.
The text message contents are stored in a Contact Log entry on the recipient's record.
