Basics
- You can include Data Fields in your Message. These are merge fields that allow you to quickly and easily add page-specific data to a Message.
- Data Fields are available on every page except Contacts. Note that Data Fields are handled differently for Notifications, Processes, and Item Notifications. (See the linked articles for more information.)
- The Data Fields drop-down is dependent on the Default Field List of that page (All Records view).
- Data Merge fields are always associated with a Page other than Contacts. To use them, the Message must be sent to a Contact via the selected records, rather than directly. In the example below, the Data Merge Fields are coming from the "Opportunities"
page (notice the Page identified in the drop-down) and Contact is the Primary Contact of the Opportunity. This is specified in the "Contact ID Field" field in the "Opportunities" Page.
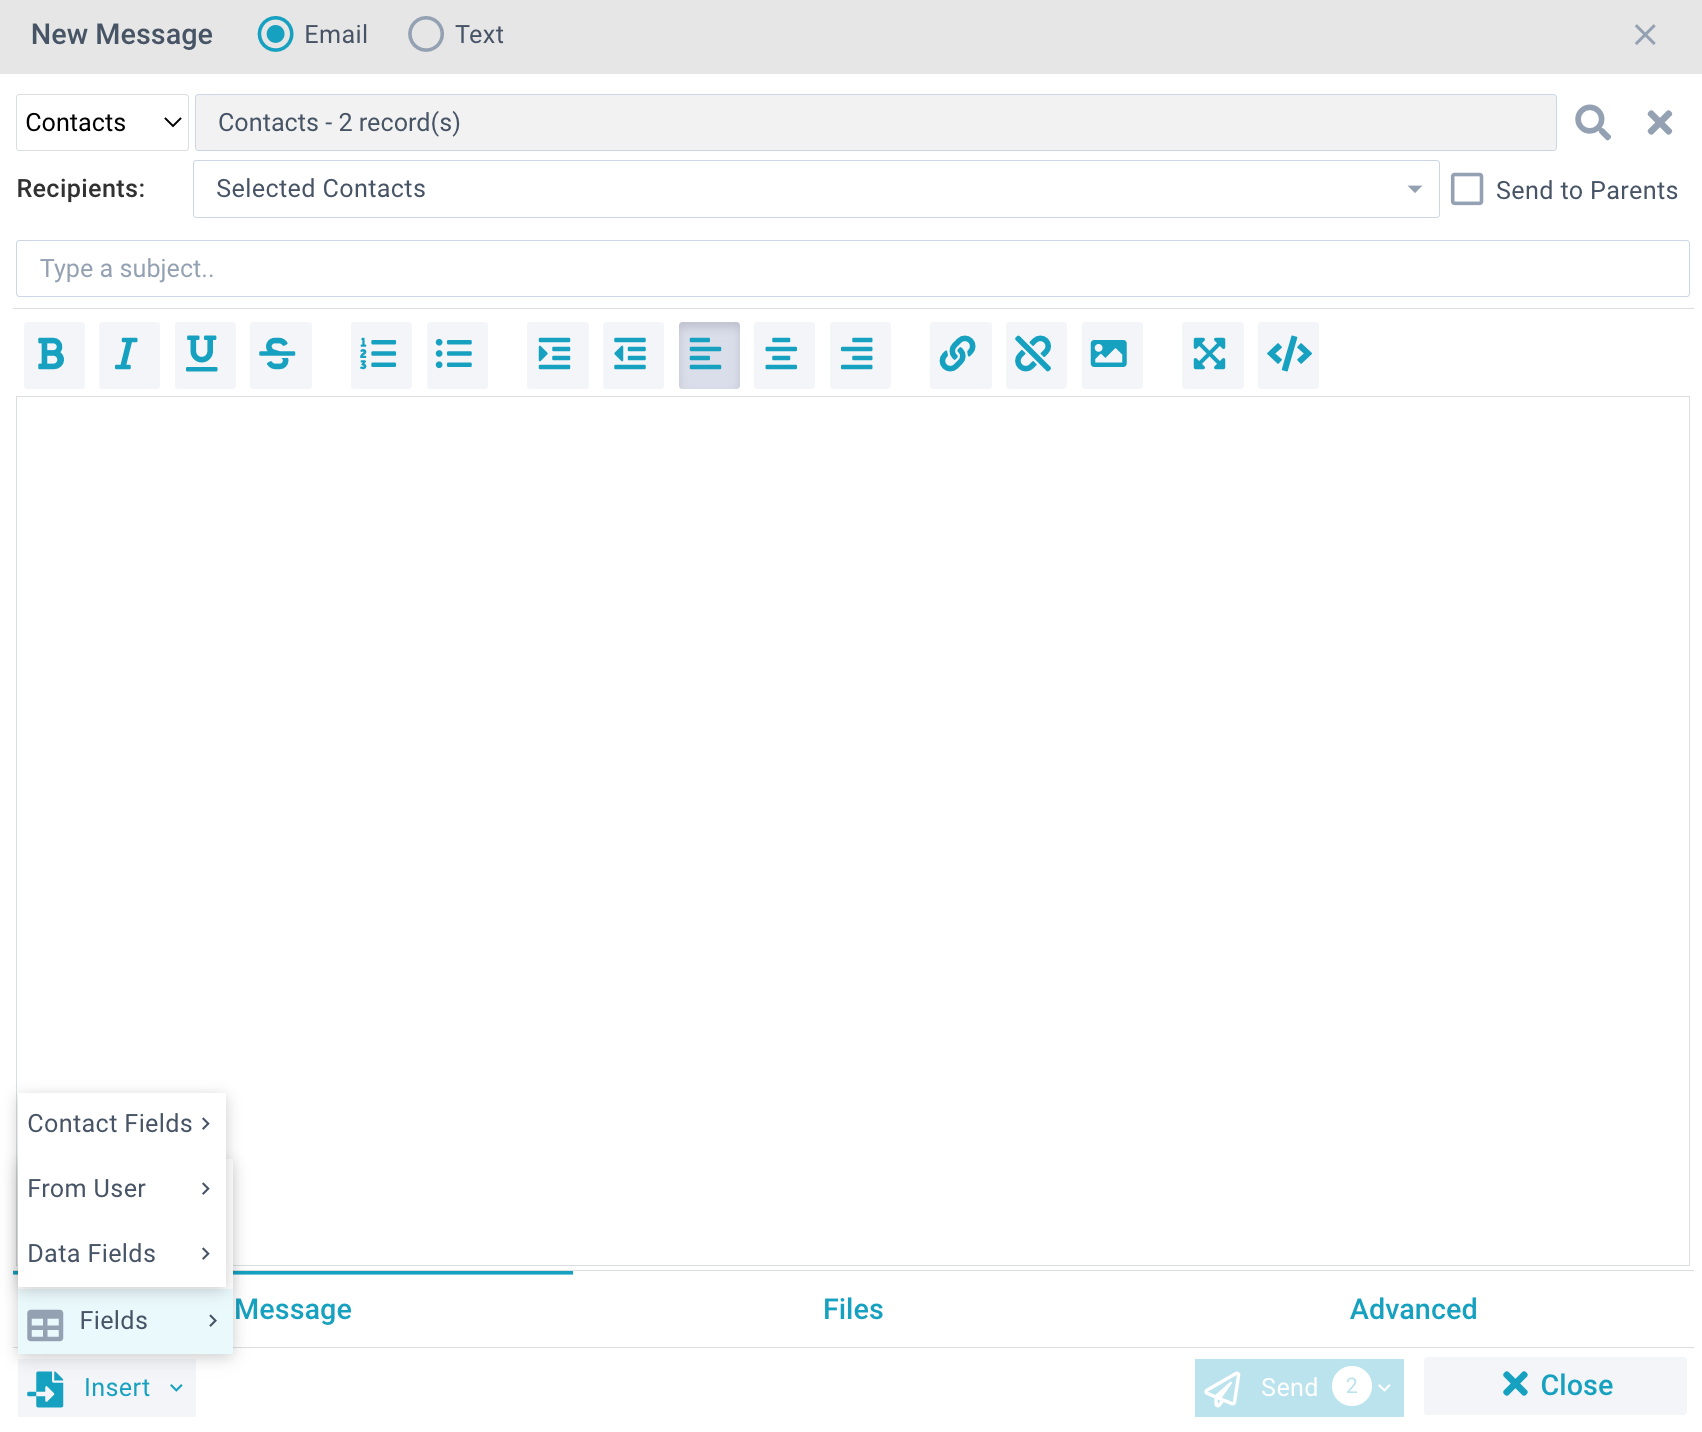
Using Data Fields
- Launch the New Message Tool.
- Place your cursor in the desired location inside your Message text.
- In the Data Fields drop-down, select the Data Field you want. The Data Field is inserted into the location of your cursor.
- Preview and Send your Message as normal.
Missing Data Field
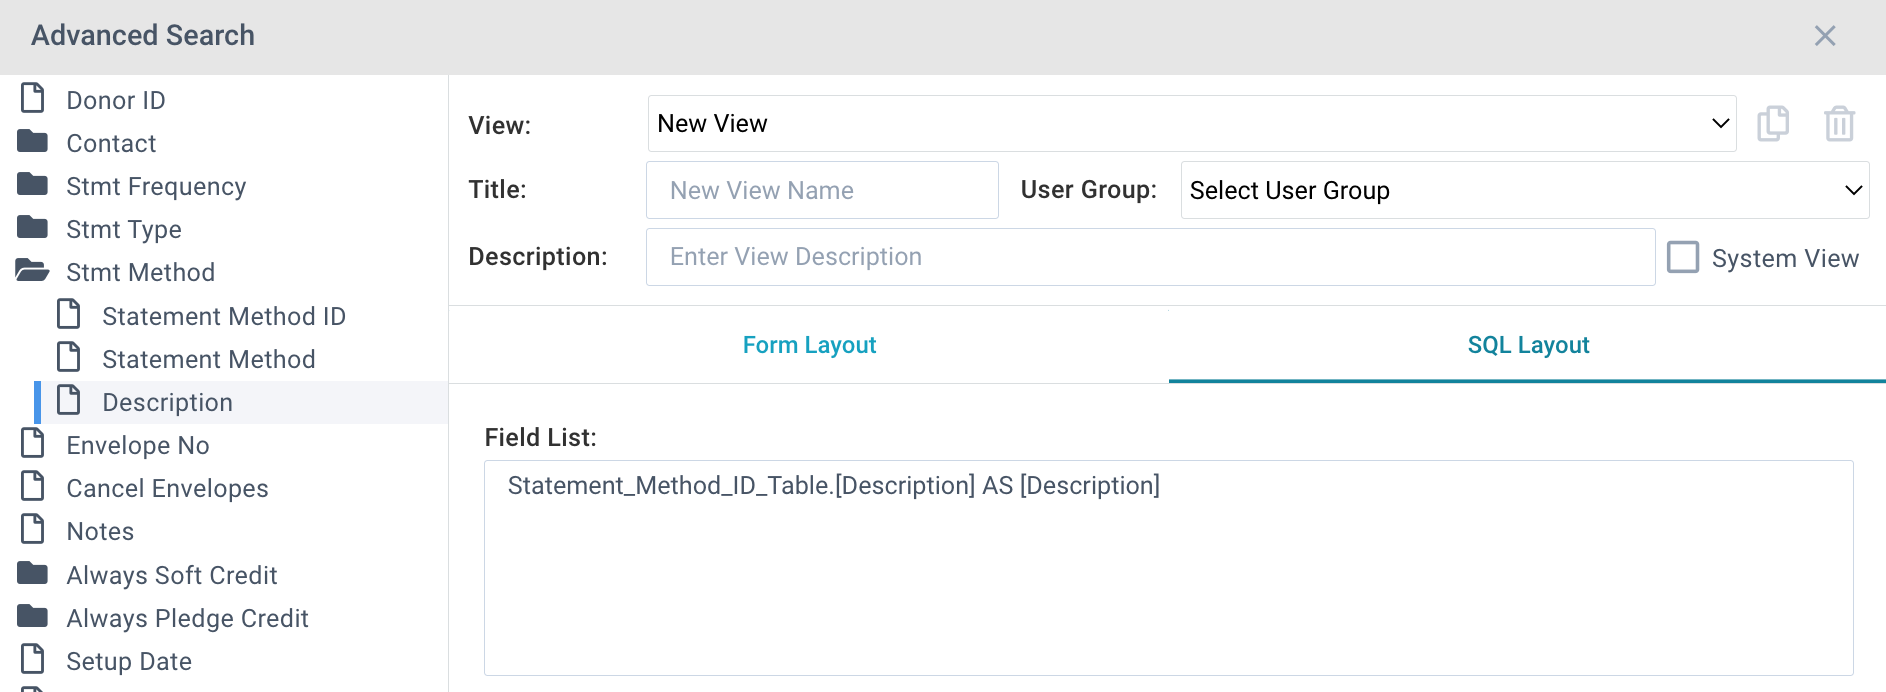
If the Data Field you need isn't currently in the drop-down,
a SPoC can add a field to the Default Field list on a Page. Adding a Default Field to a Page makes the field available in the New Message Tool. Below is an example in which the Statement Method's Description field is added to the Donors page:
- Determine the value/field name to add. To do this, go to the Page you're going to add the field to, click the Advanced Search button, insert the field you want to add into the Advanced Search tool, click the SQL Layout tab, and note the field name in the Field List box. In the following example, we'd note Statement_Method_ID_Table.Description as the field name to add.
- System Setup > Pages.
- Search for and open desired page. (In the example, this would be the Donors page.)
- Edit.
- In the Default Field List, add the field name you got during Step 1, including any underscores. The order of the Field List is how the All Records view will display.
- Save.
Specifying Contacts
The Contact ID Field is set on the Page record.
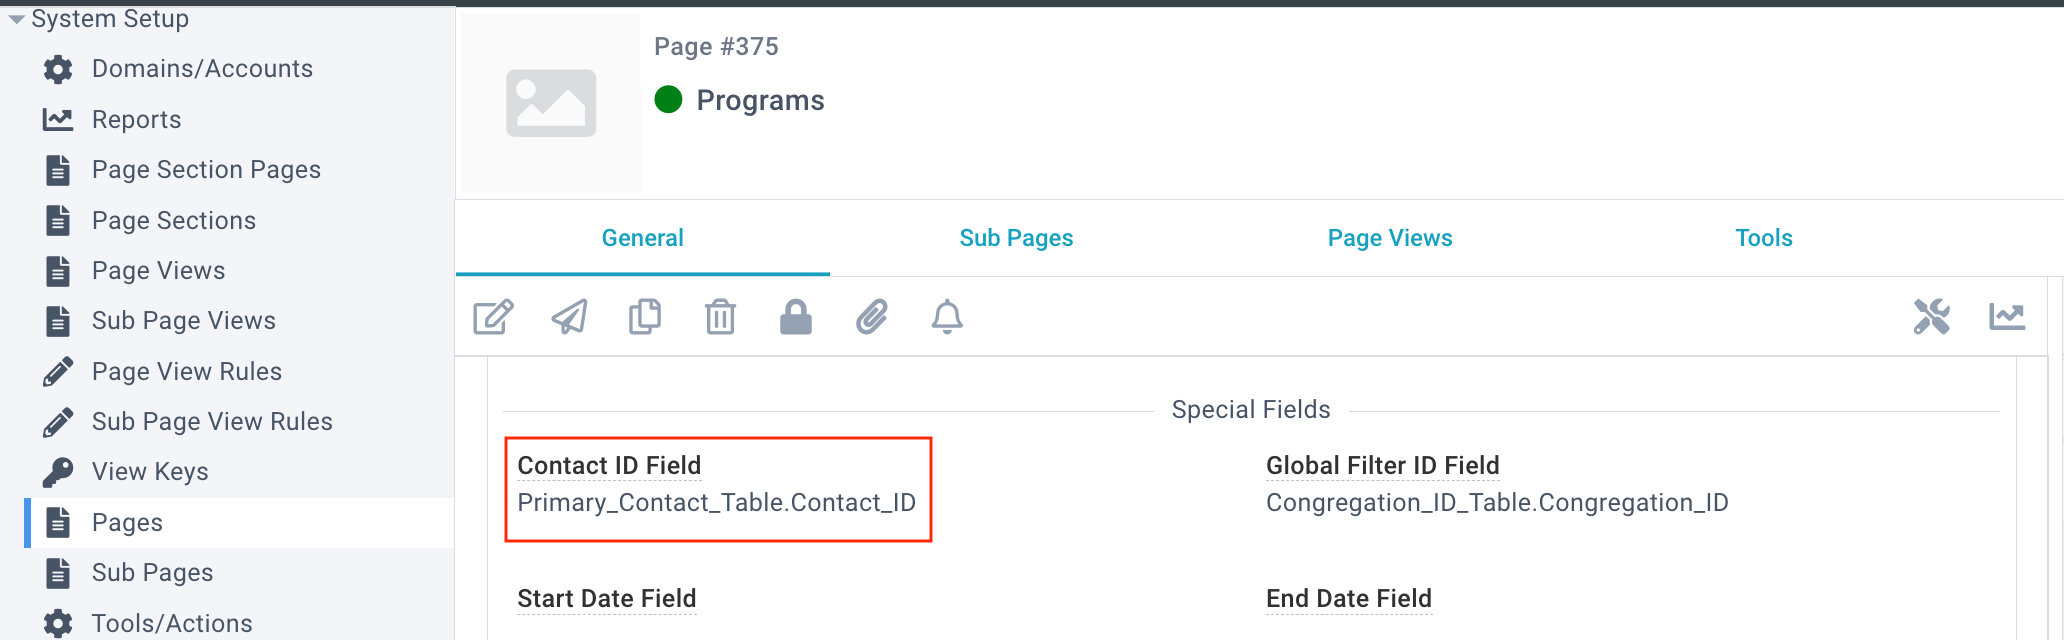
The value (SQL string) can be determined the same as Step #1 above as long as it ends in Contact_ID. Once the Value is determined, add the value to the Contact ID Field on the appropriate page. This allows the Contacts associated with the selected records
to be attached to the Messages.
