Basics
- Snippets are pre-written HTML text that allows the Message recipient to quickly and easily access their Portal accounts by automatically logging them in.
- Snippets are inserted into Messages using the New Message Tool.
- Several Snippets came pre-defined in your system. Snippets can be customized, and additional ones created.
- Once sent, the Snippet includes information specific to the recipient. Essentially, the link includes a number and character string that is specific to the recipient. As such, use care to not copy/paste Snippets from emails that have been sent, as the link is specific to the recipient (any future person to click on the link has access to the original recipient's Portal account).
- Best practice is to include a note at the bottom of any email sent with a snippet to the effect of: "The link included in this email is unique to you. Please do not forward."
- Snippets can be used in Notification Messages if the Notification supports the [Domain_GUID] and [Contact_GUID] Merge Fields. See Notification-specific articles for more detail. (Note that a snippet will not be valid if sent to Contacts that could not be matched and are assigned to the Default Contact.)
Using Snippets
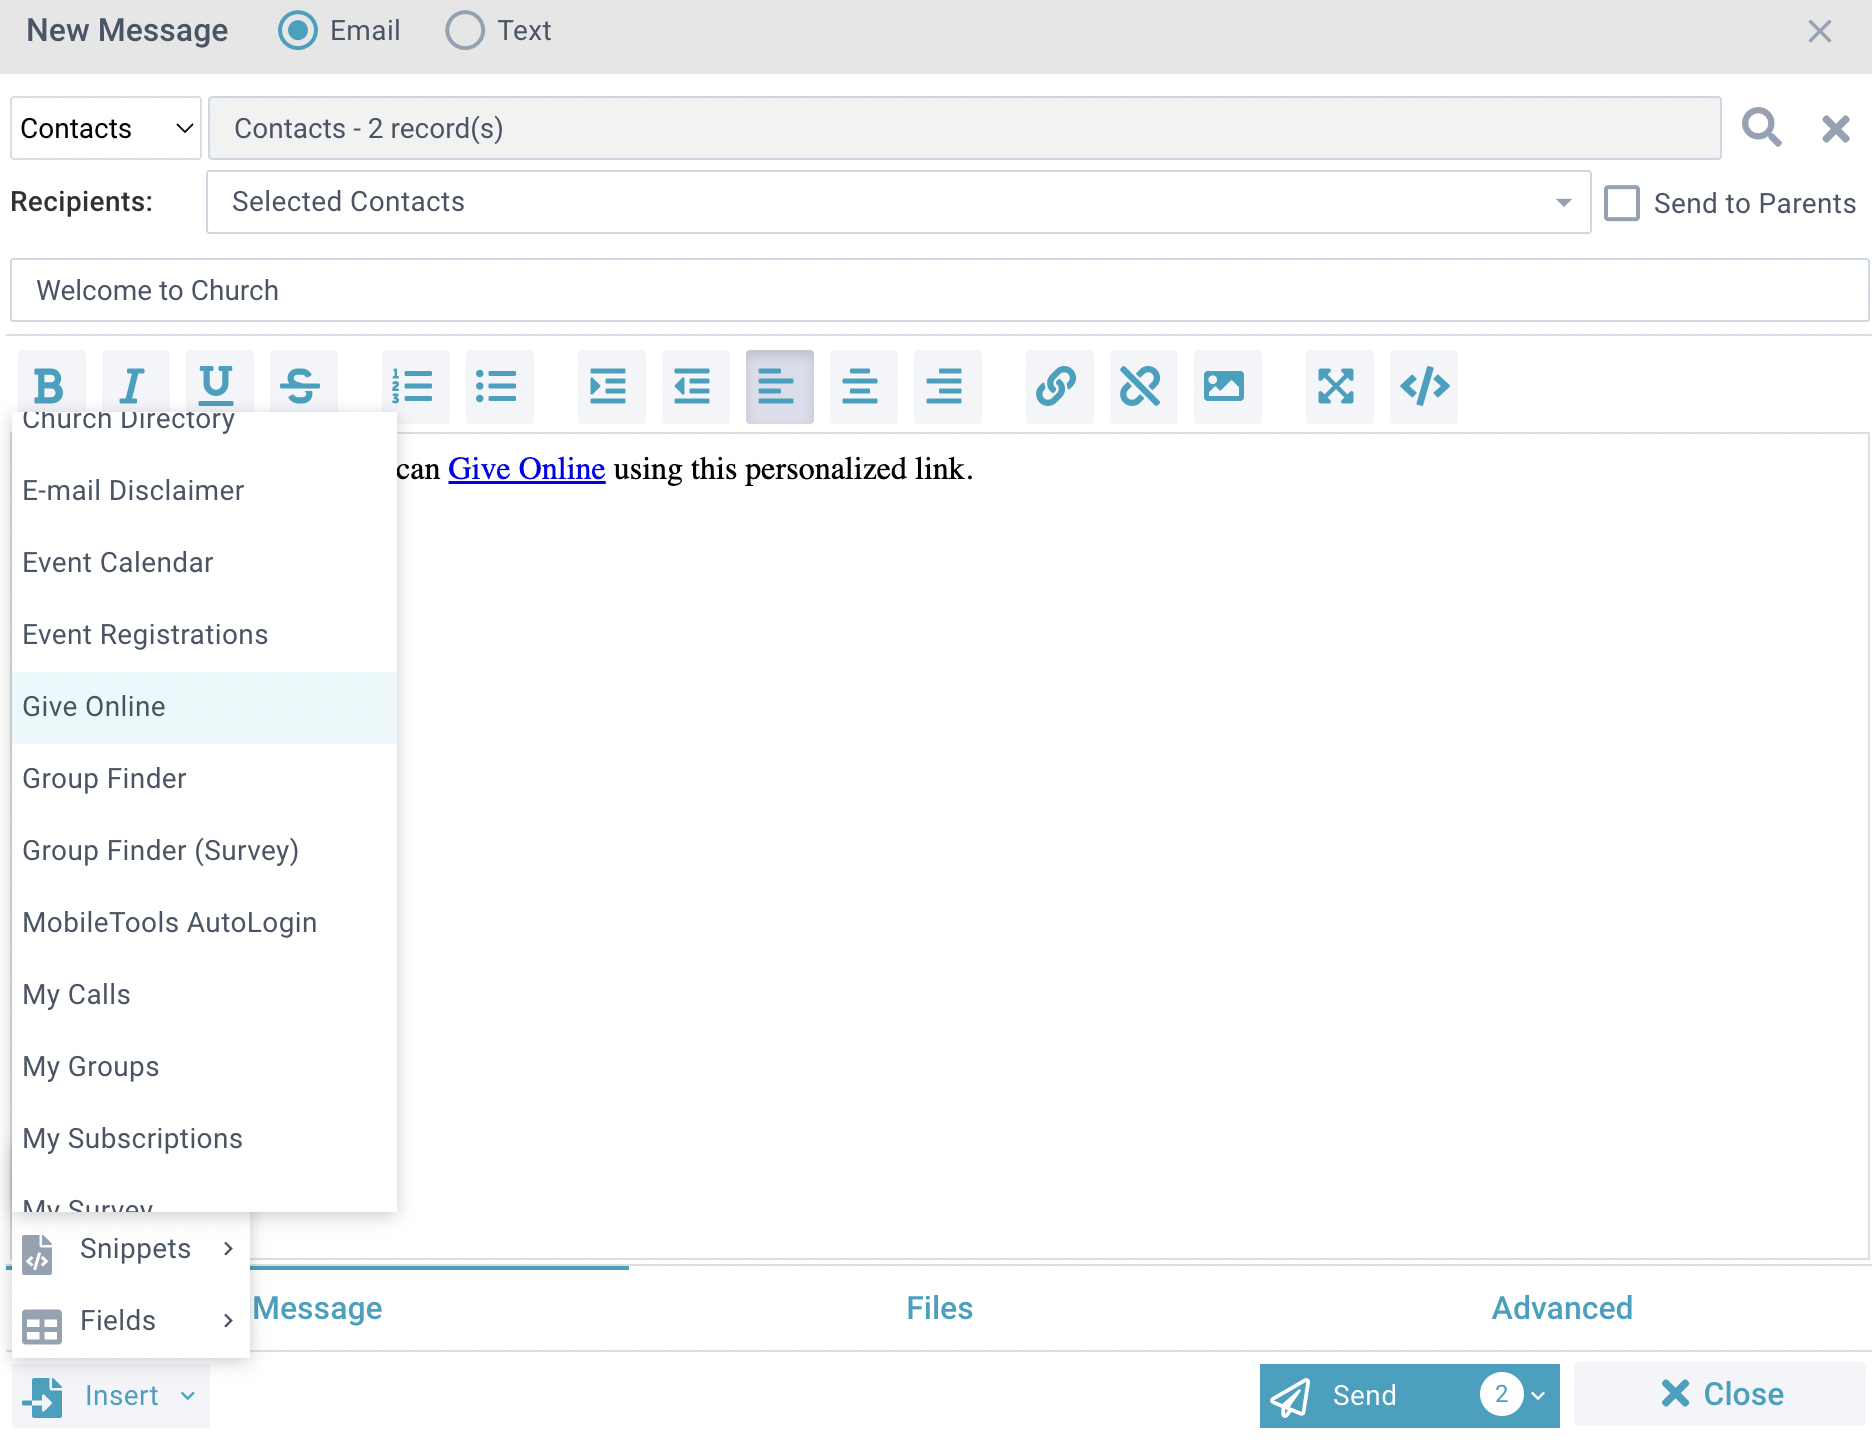
- Launch the New Message Tool.
- Place your cursor in the desired location in your Message text
- Insert > Snippets
- Select your desired Snippet
- Send your Message as normal
Each message recipient receives a unique link. To avoid sharing someone's personal link with all recipients, do not copy a personalized snippet from a previous or text message. Always insert a snippet into your message as described above.
Very Important: If you share someone's personal link, anyone who clicks that link will see that person's information. You can reset that User's GUID and break the erroneously provided link using the
Reset User Security Tool.
Editing Snippets
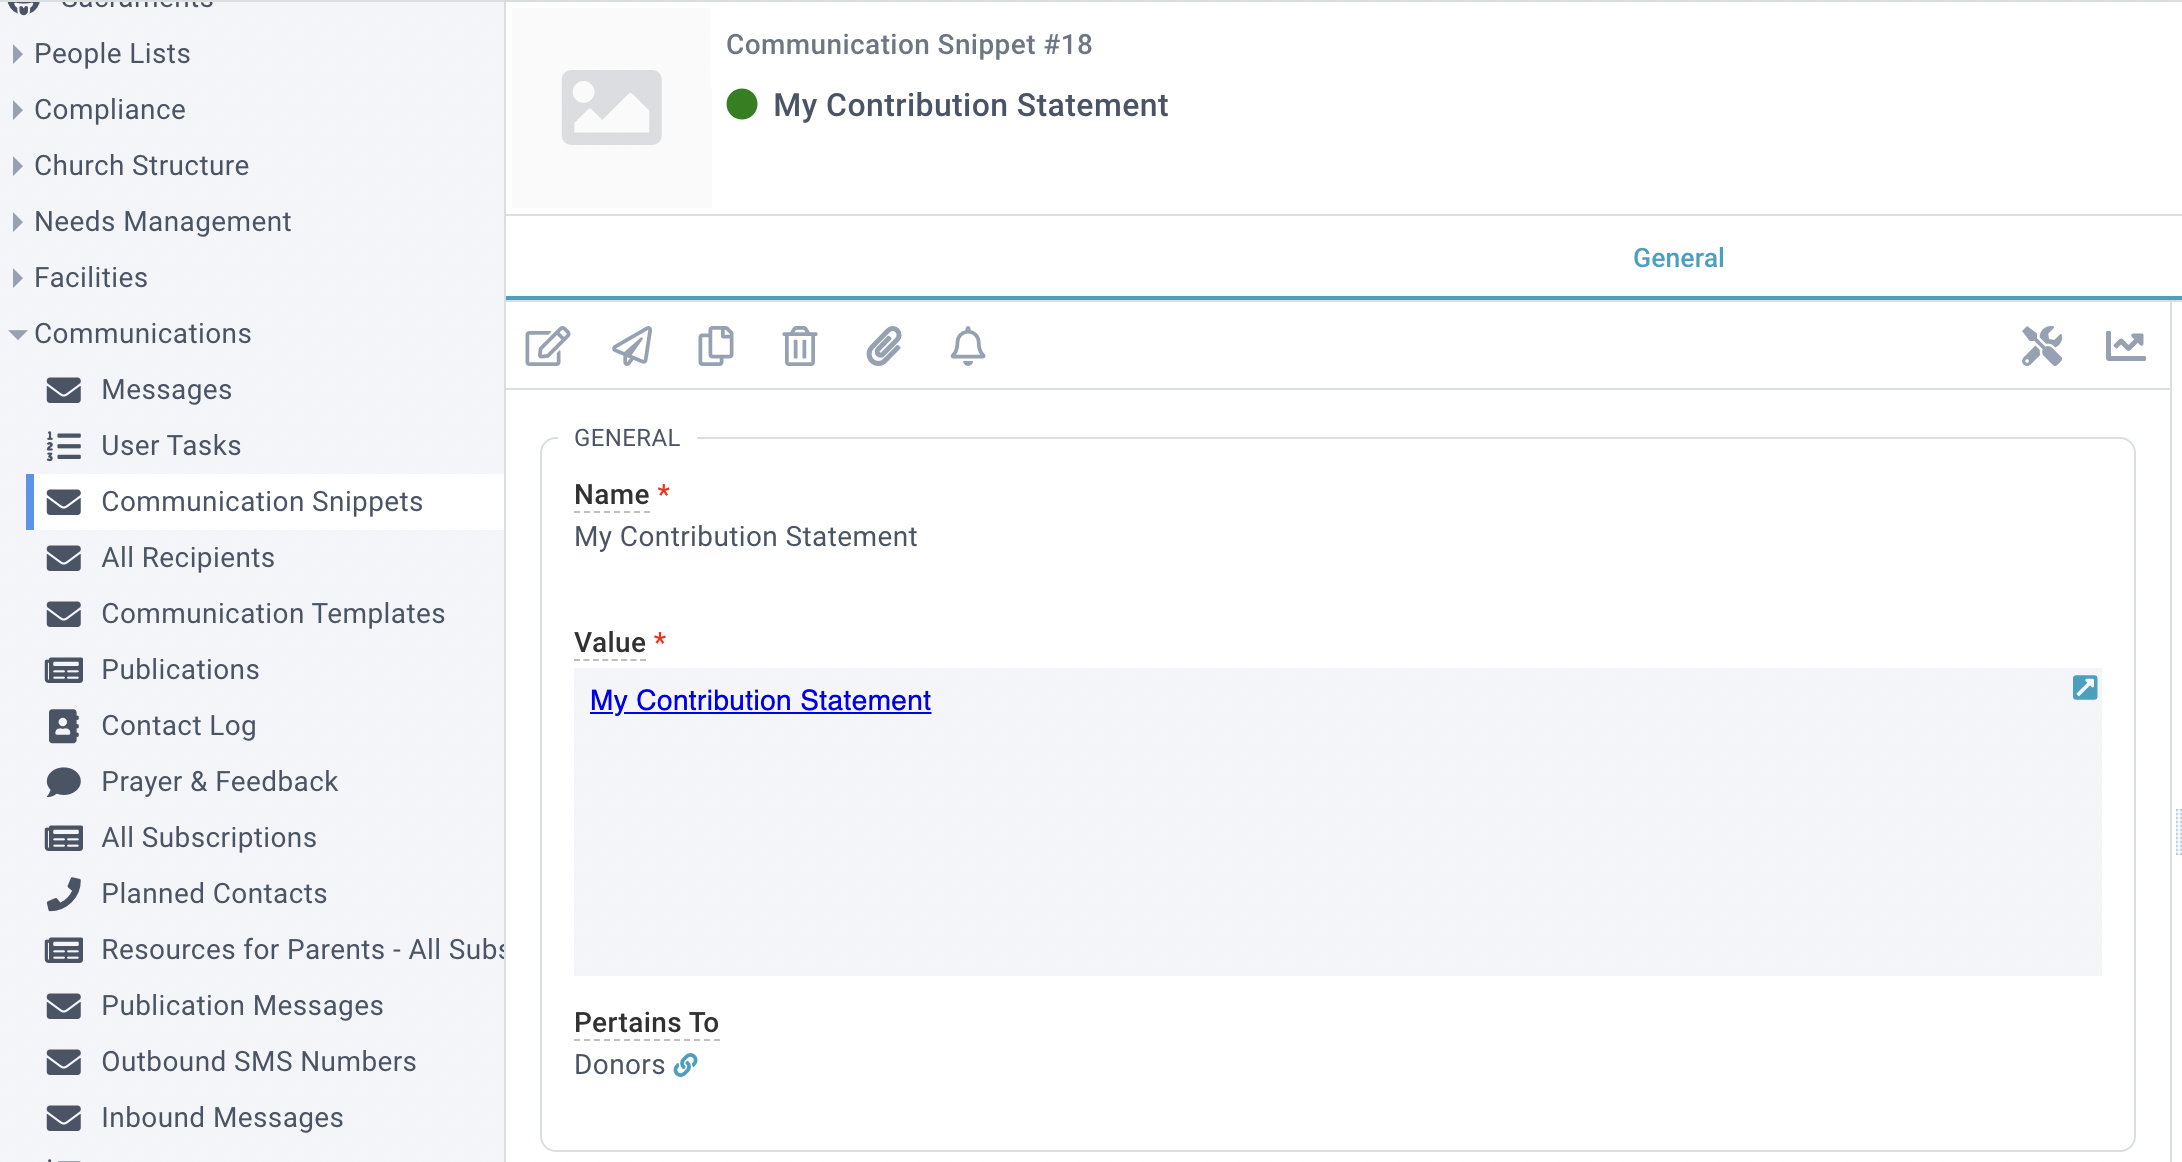
You can create and edit Snippets (for example, you could create a custom email disclaimer) in Communications > Communication Snippets.
To include links in your snippets, navigate to the desired page in the Platform or Mobile Tools and copy the URL. Note: when Groups are viewed in Mobile Tools the Group ID appears in the URL, so individual Snippets would need to be created for each desired Group link.
To restrict what page the snippet is available on, add the desired page to the Pertains To field of the Communication Snippets record. Leave this field blank for the snippet to be available on any page.
Security Concerns
There are a few things to keep in mind when using auto-login snippets. If the person forwards that email on to someone else, they've essentially logged someone into their account. It's important to remind people not to forward the email (they might do it anyway, but at least you can sleep well at night knowing they were warned!). Pro tip: Include this warning in the snippet when you create it. Then you'll never have to worry about forgetting it.
One popular snippet is a personalized event registration link:
https://{your church domain}/portal/login.aspx?dg=[Domain_GUID]&cg=[Contact_GUID]&ReturnUrl=/portal/event_signup.aspx?id=[event_ID]And here's the source code for the *Event Sign Up, with the do not forward warning included:
<a href="https://connect.{your church domain}/portal/login.aspx?dg=[Domain_GUID]&cg=[Contact_GUID]&ReturnUrl=/portal/event_signup.aspx?id=0">Event Sign Up</a>.
This is a personalized link. Please do not forward this email. 