You can create Personal Views using the Views (Advanced Search) window or by going to System Setup > Page Views.
Advanced Search always creates Personal Views or Shared Views. You can also edit these Views by selecting the View and clicking the Views/Advanced Search button.
1. Add/Edit a View (Advanced Search). Determine the page you want your View to be on, click the Views drop-down list, then click New/Copy View.
2. Enter a Title for your View. This is the name that will display in the Views drop-down list.

3. Select Fields. Add the fields you want in your View by double-clicking or dragging and dropping them in the Views window. Fields with the document icon are in the table associated with your Page. The folder icons represent relationships to other tables. Expanding these allows you to add fields from other tables, up to 6 levels. Columns of your View will appear in the order in which they descend in the Views window. To reorder columns simply drag and drop into the desired location.
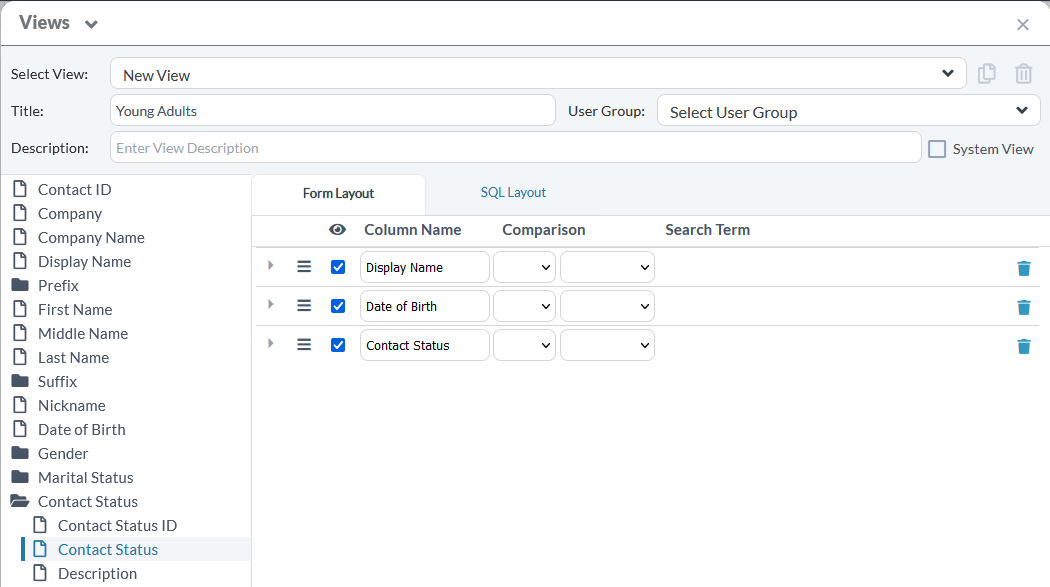
4. Add Filters. Views are required to have a filter, which is some criteria that limit the resulting list. To create filters, set comparisons and Search values on the fields you have selected. See SQL Comparisons for more details.
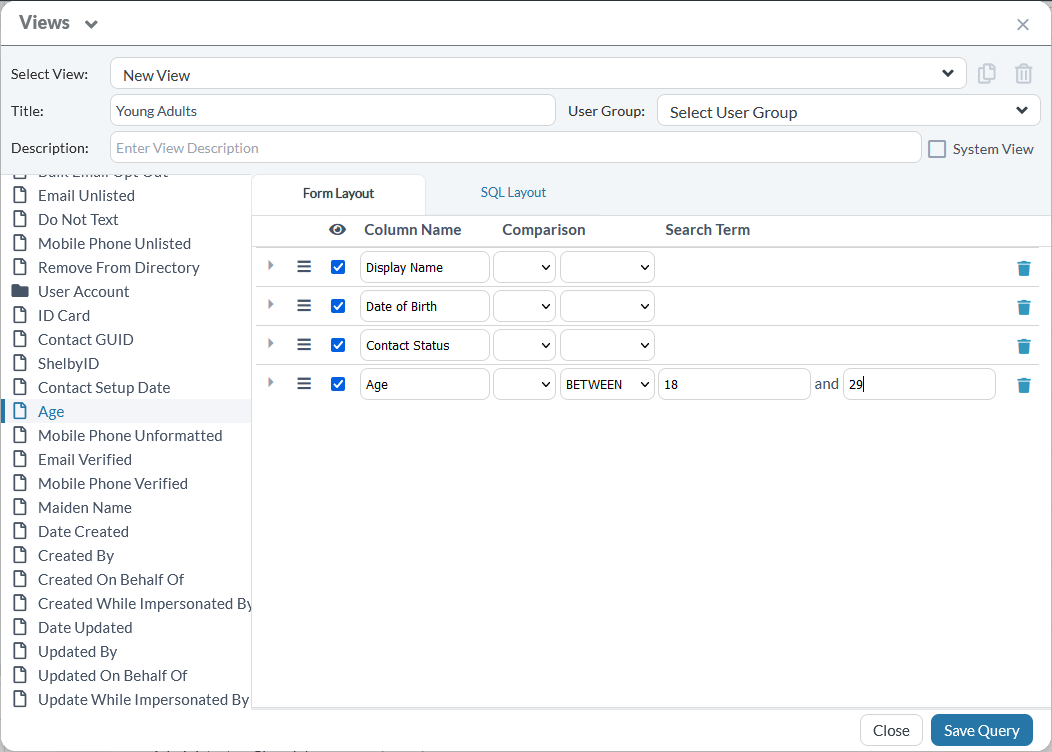
5. Save your View. Click Save and your View shows up in the Views drop-down menu. You can edit it by clicking Edit on your View.
To make changes to your Personal View, select it from the list and click the funnel icon.
When launching the Views/Advanced Search Tool, you may receive the following message:
System was not able to parse and recognize some of the expressions in the field list and filter clause! Do you want to continue?
This means you have SQL in your View which cannot be edited by the point-and-click method.
To add fields to a View that already has custom SQL, you can follow this procedure to use the point-and-click method to select fields and still retain your custom SQL:
Get the Fields to Add
Add the Fields to Your Complex View
You can delete a Personal View using the Views/Advanced Search Tool as long as there are no View Notifications attached. You can attempt to the delete the View and the system will show an error if View Notifications are attached.
To remove View notifications associated with the View, navigate to the “My Notifications” tab, located on the Home page. Select and remove any existing View Notifications for the View.
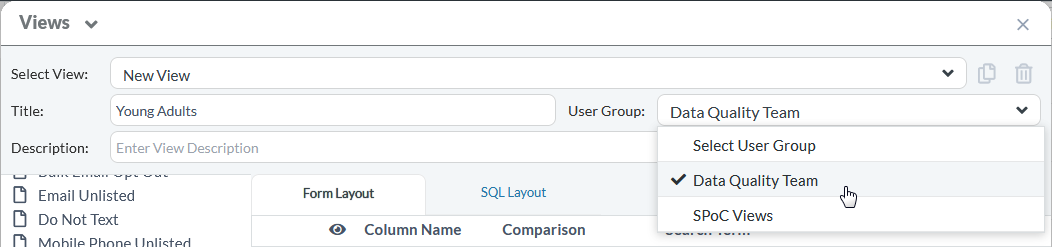
If you would like to share this with a User Group, select the group from the list. See User Groups for more information.
If you'd like the view to be available to all of your Users, check the System View box. Note: All of your Users will be able to access, but not edit, System Views. If a User edits a System View, a copy will be created, leaving the original View intact for all Users while allowing for additional customizations to the new View.
In order to add a field from a related table, a user must have at least read access to that page. If only the record ID is visible, the user's rights must be adjusted. For more information, see View Permissions.
Comparisons are always added to the Views/Advanced Search using the AND operator.
To attain the same functionality as an "OR" statement, use the "IN" option. First, look up the record IDs for the criteria that is appropriate. Then use the "IN" filter to add the appropriate record ID's to the field in the advanced view. For example, if you want to include two different Group Roles in your view, find the record IDs of the Group Roles you want to view by going to the Group Roles page and opening the record. Then go back to the page your view is on. Add the "Group Role ID" field and filter it using the "IN" option and include the two numbers separated by commas.
If you have access to System Setup > Page Views, there are additional ways you can create, edit and manage Views. See also: Page View Fields.
In the Page Views page, you can copy an existing View and make a personalized version:
Example: An "Anniversary Next Month" view could be created by making a copy of the "Birthday Next Month" view and replacing the birthday field with the anniversary field. You should check the Field List, View Clause, and Order By for the field you're changing.
