Basics
An Item Notification is a scheduled email associated with a View, Selection, or single Record.
- View Notifications can be created for any View that the currently authenticated user has access to:
- Emails are sent on a schedule.
- Emails contain a snapshot of the information at the time when the notification was sent.
- Email may be suppressed when a view contains no records.
- Selection or Record Notifications can be created for any single Record or Saved Selection that the currently authenticated user has access to:
- Notification emails are sent on a schedule or triggered by changes to a record in the Selection.
- Email displays the selected record(s) arranged according to the page's "All Records" view.
Note: Users who have opted out of bulk emailing (i.e.,
Bulk Email Opt Out is set to Yes) will still receive notifications that are set up to go to them.
Common Uses
- Visit the Database: Bob doesn't use the database every day, but once a month he needs to review specific information. He relies on a View Notification as his reminder.
- Save a Trip to the Database: Sally always needs to know certain facts on Monday about the weekend. She uses a View Notification to save her a trip into the database.
- Stay Aware of Changes in the Database: Steve is responsible for a certain set of volunteers. He would like to be apprised of any changes made to their Contact records and uses a Selection Notification to accomplish this.
- Track Volunteer Applications: Lisa is recruiting Welcome Team volunteers. She would like to know how many people have applied in the past 72 hours.
- Monitor Event Registrants: Brad wants to know how many children have been registered to attend Vacation Bible School.
- Review Name Changes: Amy reviews all name changes to make sure they weren't made in error and are appropriate.
- Notify of Weekly Giving Totals: Gil wants to know the weekly giving totals each Monday morning.
Configuring Item Notifications
Items To Watch
- Current Record: Facilitates notification as relates to a single Record. This option must be launched from an open record.
- Selected Records: Facilitates notification based on a Saved Selection. Drop-down displays all Selections the current user has access to for the current page.
- View Notifications: Facilitates notification based on a View. Drop-down displays all Views that the current user has access to for the current page.
Deliver To
- My User Record: Sends to the currently authenticated User. To set up a notification for others, you'll need rights to impersonate their Platform User.
- User Group Members: Sends to all members of the selected User Group.
A SPoC may create or edit User Groups using the User Group page under Administration.
- Results Using Template: Delivers the selected Message (Template) to the Contact associated with each row. Note: This option is only available only for "View Notifications" and only
when records are clearly associated with a Contact (Contact_ID_Field is defined on the Page).
Schedule
- Subject: The User's custom subject line that will be included when the notification is delivered. Pro Tip: Make it irresistible so it gets opened right away!
- Immediately (When Updated): Sends any time a change is made to one of the specified records. Available for "Current Record" and "Selected Records" only.
- Using Existing Schedule: Allows schedules to be re-used and shared among notifications. Drop-down displays all schedules previously created by the currently authenticated user.
- Using New Schedule: Allows a new schedule to be defined including a recurrence pattern of when the notification should repeat (for example, daily, weekly, monthly).
- Send Empty Views: When checked, an email will be sent even if the view returns 0 records. When unchecked, emails will be suppressed. Available only for "View Notifications."
Notification Emails & Texts
In addition to configuring the recipient and schedule, it is important to understand the contents that will be delivered in each case:
- Single Record: The email displays a grid of all fields and their value.
- Selection: The email contains the first ten selected records arranged according to the page's "All Records" view. It also A link to the Selection is also provided.
- View sent to a "User Record" or "User Group": The email contains the first ten records in the view. Note: The notification email includes the first six columns of the view. A link to the View is also provided.
- Whether Views containing 0 records are included in the notification email depends on the Send Empty Views setting (see above).
- All members of the User Group must be granted access to the View to receive the notification.
- View sent to "Results Using Template": One email or text is sent to the Contact related to each row. The message contains the Message Body of the specified Template.
- Before scheduling your Results Using Template Item Notification:
- Create your Template, and set the Communication Type field to Email or SMS text.
- Set Active to Yes.
- If you chose SMS text, make sure your system is configured for texting via Twilio.

- When scheduling your Results Using Template Item Notification, select the appropriate Template from the drop-down list.
- If a Contact does not have an Email Address in the database, they will not receive the notification, if it was sent via email.
- If a Contact does not have a Mobile Phone Number in the database, they will not receive the notification if it was sent via text.
- Want to use merge fields in your template? That's great! To ensure the fields are merged correctly:
- Add the page the item notification will be sent from to the Pertains to Page field when creating your template.
- You can use Contact merge fields and merge fields from the identified page in your template.
- When you build your notification view, be sure to include the same columns, aliased the same way that you used as merge fields.
Additional considerations:
- For a Template to be available for a View Notification, both the Template and Active fields must be set to Yes.
- If two Display Names are in the View, open a record to determine which Contact the email will be sent to.
- View Notification Emails use the From and Reply To Contacts set on the Message Template. View Notification Texts use the SMS Number on the default Outbound SMS Numbers record.
- You must have one Outbound SMS Number with Default set to "Yes". Otherwise, the text will not be sent and the Message record will not be created, even though the User Notification record indicates that it went out (via the Last Execution field).
Important! View Notifications delivered to "Results Using Template" take into account the authenticated user's Global Filter access. For example, a View showing birthdays next month may return 1,000 Records. If the authenticated user is limited to South Campus, they may see only 200 Records for this View. When configured,
their Notification would be sent to only 200 recipients. Another user setting up a View Notification from the same View may reach a different number of recipients.
Use Examples
Deliver To: User Record/User Group
Sending Notifications to yourself or a User Group is designed for reviewing any shortlist of records on a regular interval and may be used to:
- Identifying newly Active Contacts.
- Stay on top of problems that need fixing such as Views you want to "keep empty" like fix Views.
- Get a reminder of missing information.
- Review records you would like to see regularly, such as:
- First Gift This Month
- Open Care Cases
Deliver To: Results Using Template
Sending View Notifications to email addresses is designed for emailing people who meet a set of criteria and may be used to:
- Welcome new Participants who checked in for the first time in the last week.
- Thank Donors who gave for the first time in the last month.
- Congratulate a Participant for a new Milestone Assigned in the last month.
Tip: Most of the time you want to use a View that is looking at a dynamic date (last 7 days, last month, etc.) and match your Item Notification Schedule accordingly to ensure that the same people are not emailed each/multiple
times when the notification runs.
Creating an Item Notification
There are many ways to configure Item Notifications and they can serve a variety of needs. The examples below demonstrate a few configurations to get started.
Items To Watch: Current Record
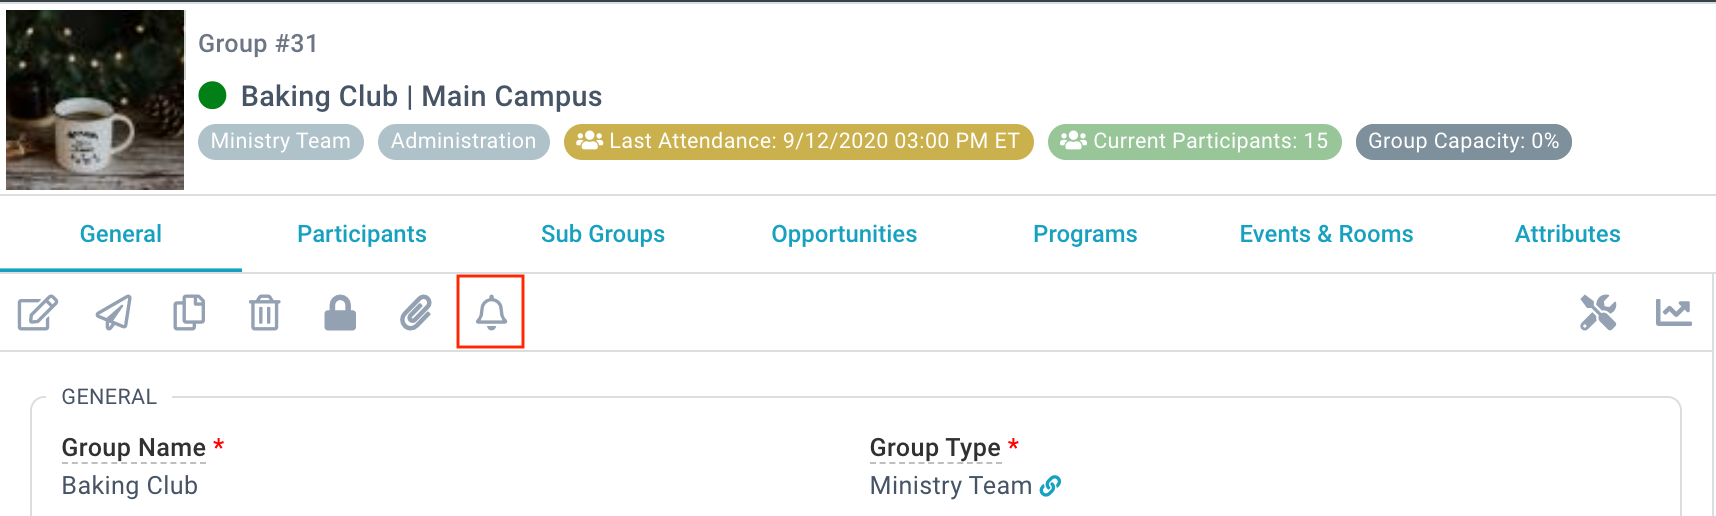
- Start on desired open record.
- Click the bell icon.
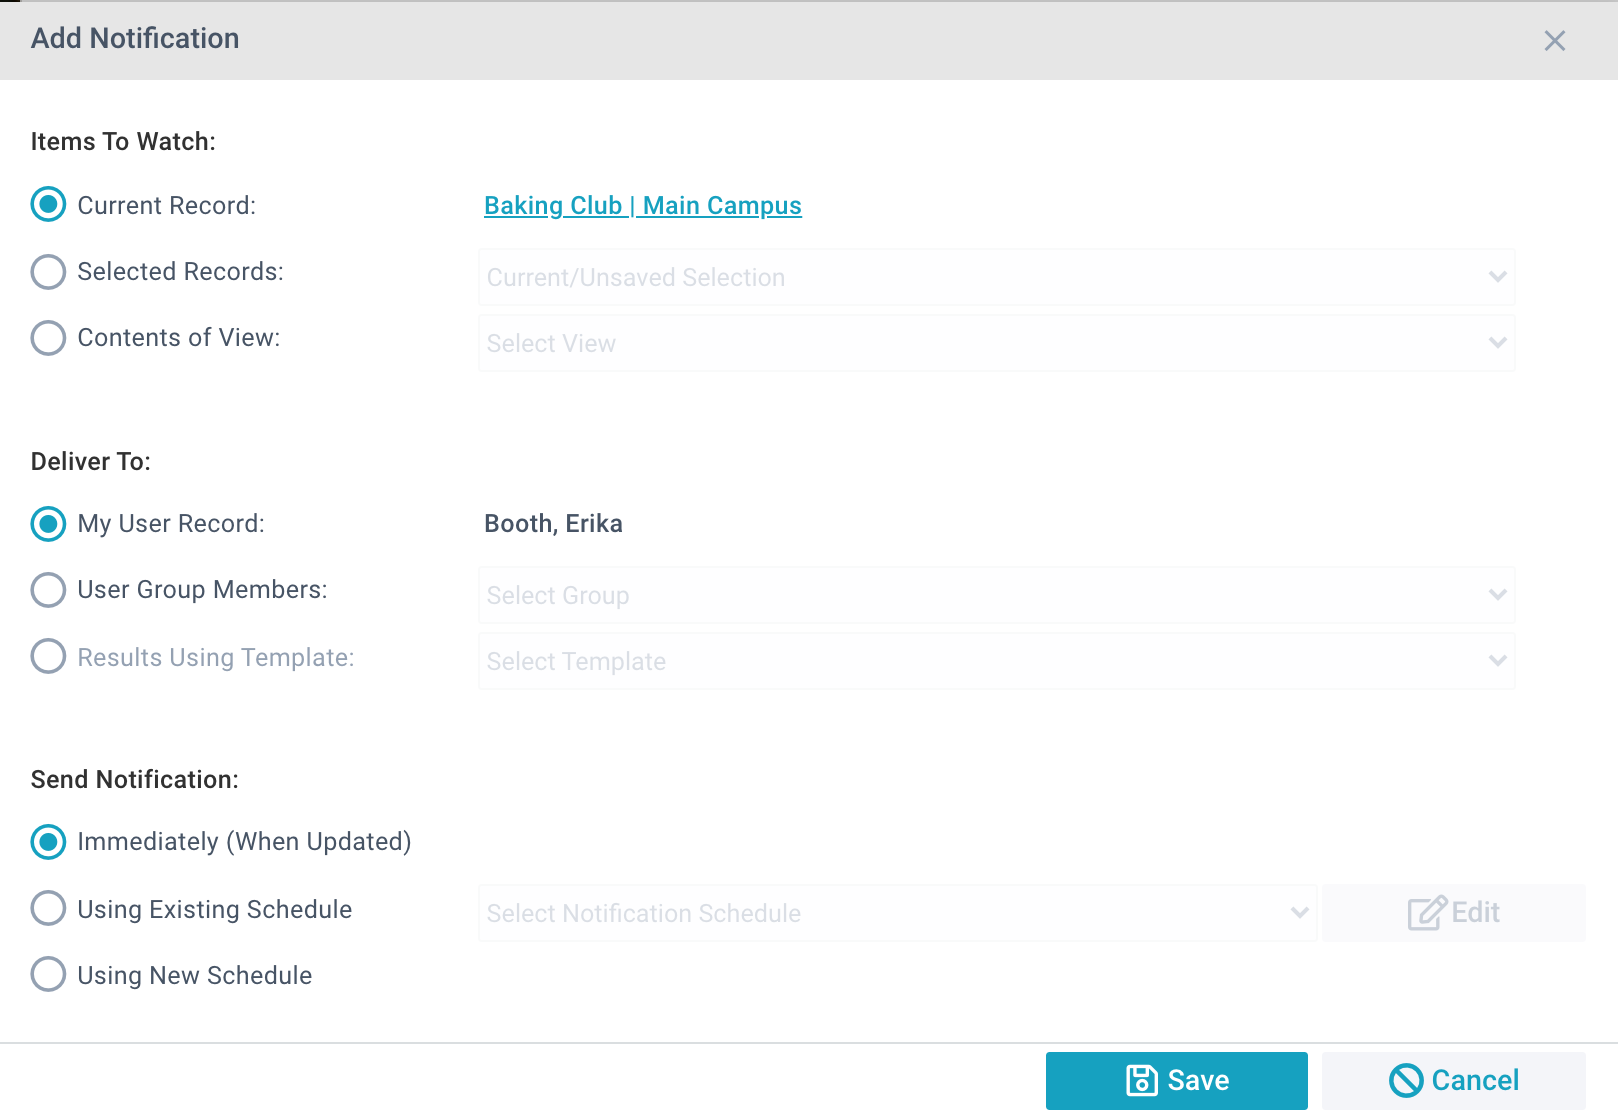
- Select Items To Watch: Current Record.
- Select Deliver To: My User Record.
- To receive a Notification when the Record is updated, select Send Notification: Immediately (When Updated).
- Click Save.
Items to Watch: Contents of View
- Select a View (other than All Records, which is technically not a View).
- Click Notify.
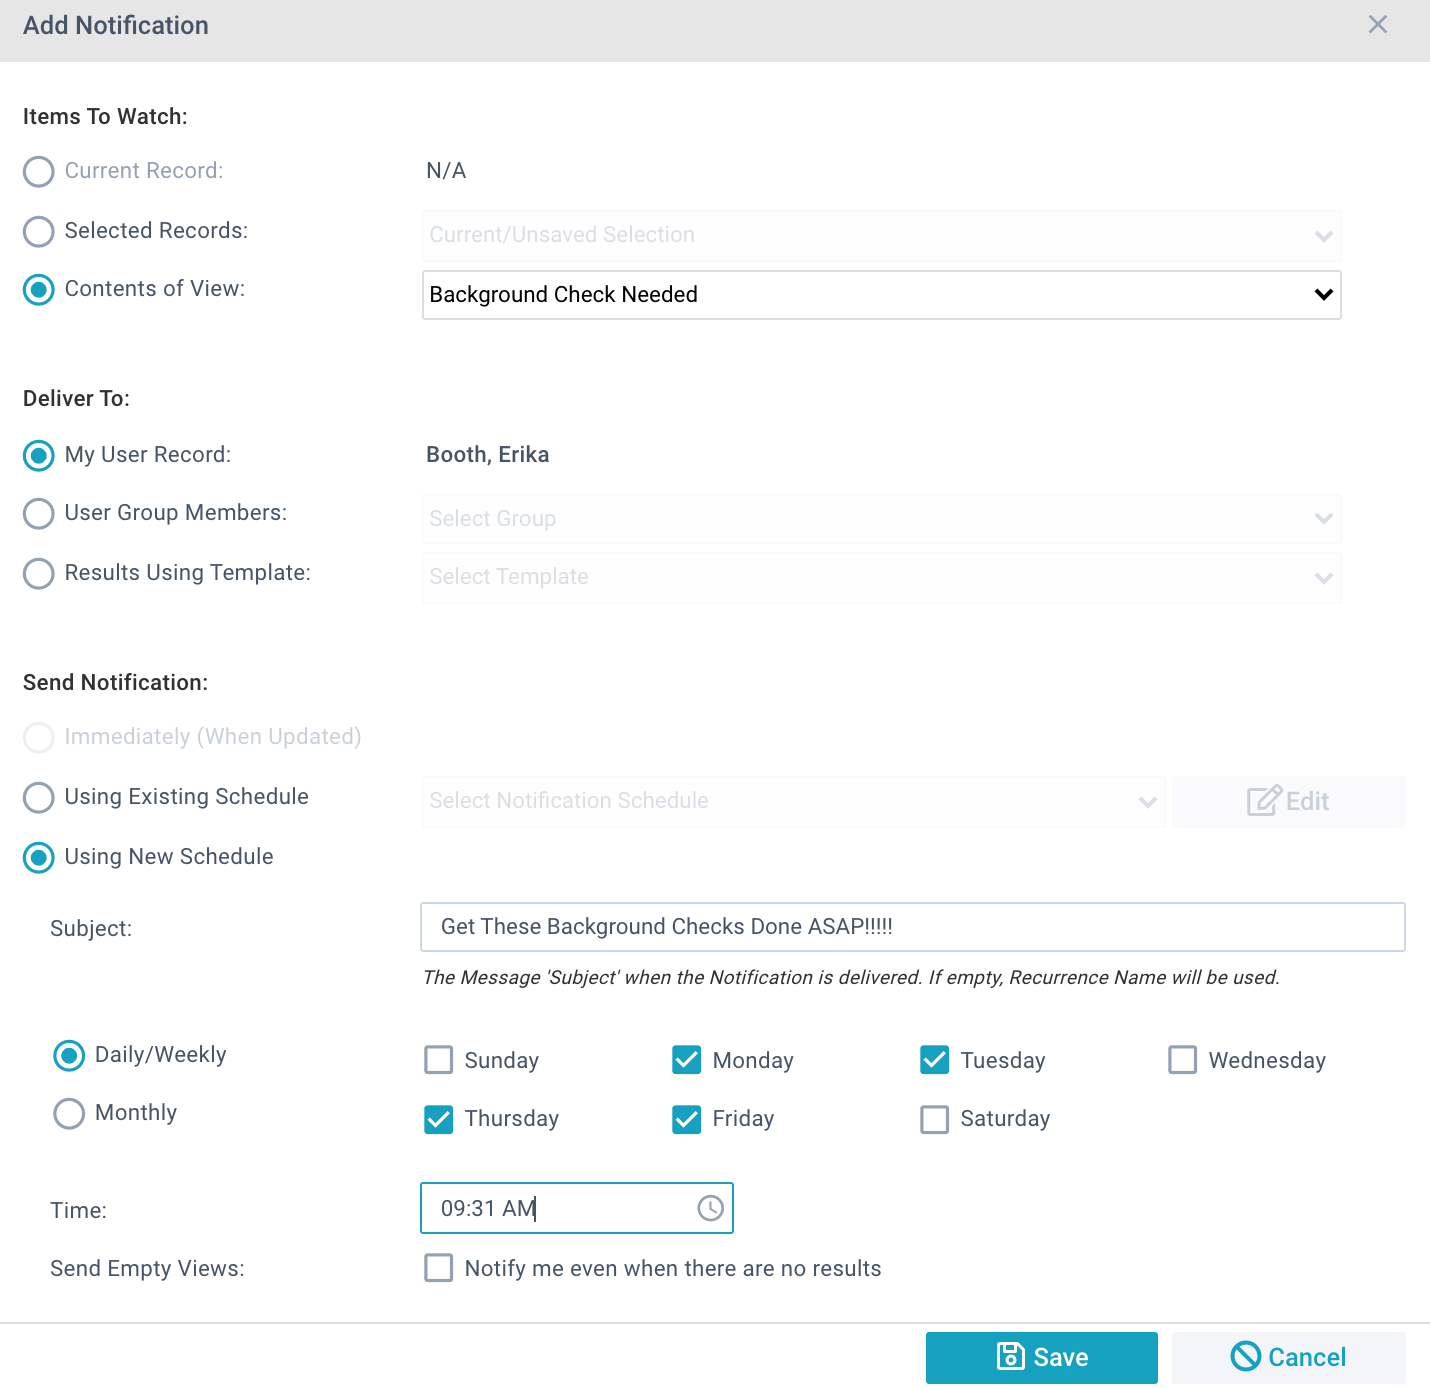
- Select Items To Watch: Contents of View.
- If each person in the View should receive an email, select Deliver To: Results Using Template then choose Template.
- Add a compelling subject line.
- Select an existing Schedule or create a new Schedule as desired.
- Choose Save.
Scheduling Item Notifications
Anytime a user creates a new schedule, it's available to that user for future Notifications. All Notifications using the same schedule arrive in one email.
Note: We strongly recommend not scheduling your Item Notifications to send between 2 and 3am. If scheduled to send between 2 and 3am, the notification schedule (much like your sleep schedule) will be thrown
off when daylight savings rolls around. It will get stuck in a loop and send notifications repeatedly. You can avoid this excitement by scheduling your notification for a different time.
Troubleshooting Tips
If your Item Notification is not sending, check:
- Check that the View contains no duplicate fields. If a field has been added twice, the View Notification will not send.
- Check that you still have permissions to the Page, View, and Notification settings originally used to set it up.
- Check that the saved Selection has not been cleared.
- The Administrators role must have permission to every Page where a Notification is scheduled.
If your Item Notification is behaving unexpectedly, try deleting and recreating it.
My Notifications
Your Notifications are listed on the Home page under the My Notifications tab. This is where they can be modified or removed. This page will only show the Notifications you have created. If you receive a notification that someone else set for
you, such as a User Group notification, it will not appear here.

Modifying an Existing Item Notification
- Go to the My Notification tab on the Home page of the User who created the Item Notification.
- Click the desired Notification.
- Edit as desired. Note that any Item Notifications sharing this schedule are also updated.
- Click Save.
Deleting an Existing Item Notification
- Go to the My Notification tab on the Home page of the User who created the Item Notification.
- Click the desired Notification.
- Click Remove.
