Basics
- Option Groups allow you to extend a Product's functionality.
- After you create an Option Group record, you create individual options (Option Price) records that are placed together within the Option Group.
- A single product can have multiple Option Groups. For example, your Women's Retreat may have an Option Group that defines how many roommates the registrant shares a hotel with (the choice impacts the price they pay). Another Option Group may allow them to decide if they wish to pay for an optional sightseeing trip taking place during the retreat.
- As you can see in the example below, Family Members is the Option Group and Spouse, Child 1, Child 2, etc. are Option Prices.
Creating an Option Group
The Option Groups page is located under Products & Payments. You can create a new record from that page or from the Option Groups sub-page of an open Product record. In either case, you populate the same fields:
- Option Group Name: A friendly name that encompasses all of the options that will be part of the Option Group (for example, Registration Options or Promo Codes).
- Description: An optional description of the Option Group.
- Mutually Exclusive: if Yes, the user can only pick one of the Options assigned to this Option Group.
- Required: Forces the user to choose at least one option in the Group.
- Note Label: This field allows the user to provide a quick note for each option. In the above example, Name/Ages is the Note Label. Note: Information entered in this field by a user will display on their Invoice Detail in the "Item Note" field.
- Online Sort Order: if there is more than one Option Group, this field controls the order the Option Groups sort in relation to each other.
Once the Option Group is created, you need to create at least one Option Price.
Creating Option Prices
Once your Option Group is created, open the record from the Option Groups page (if you open it on the Products sub-page you won't be able to add or edit options within the group - use the jump button if you made a new Option Group on the Products page). You should see an Option Prices sub-page where you can add individual options for this group.
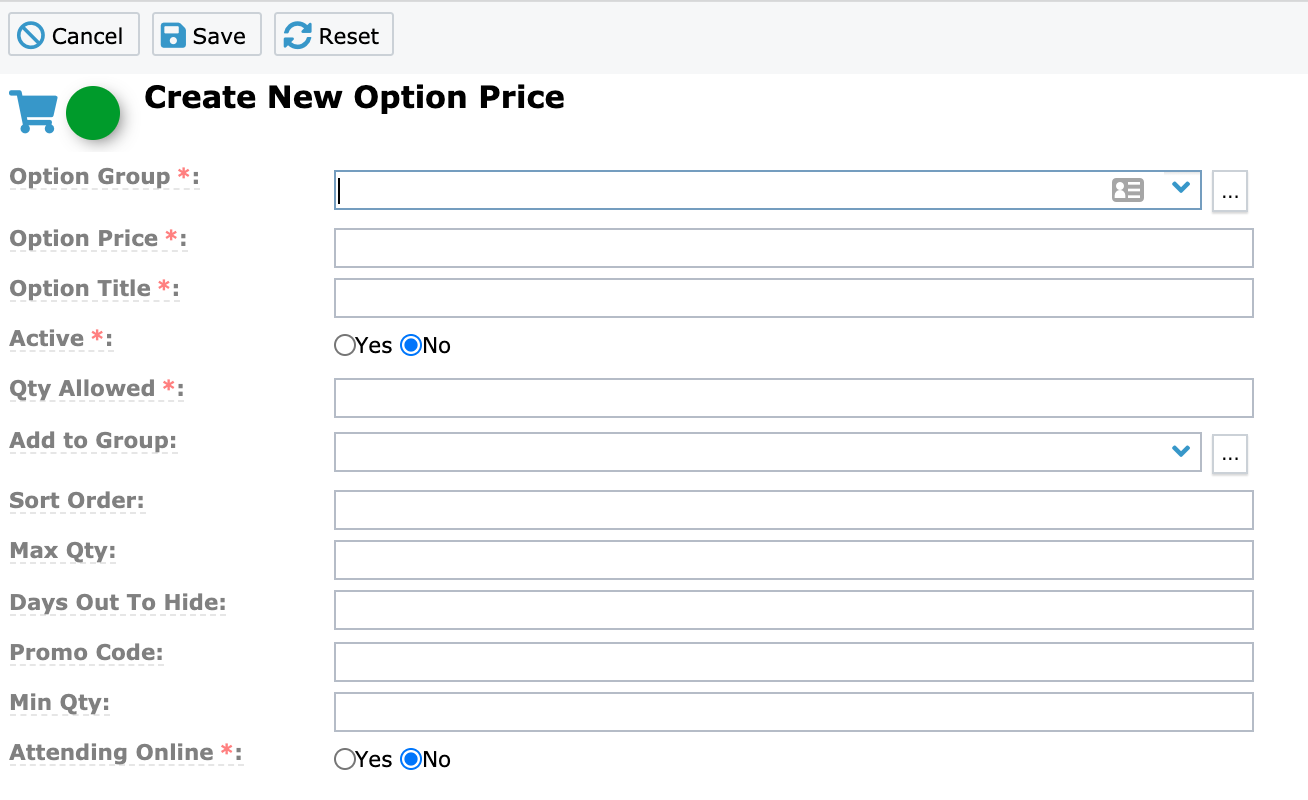
- Option Price: the fee for this option, which is added to the total registration cost. If you set the price to $0, the price is replaced with the "free product option name" configuration value (which can be customized by a SPoC).
- Option Title: the name of the option.
- Active: if Yes, the option is available for use in Event registration.
- Qty Allowed: indicate the maximum number of this option that registrants are allowed to choose. If set to 1, a checkbox or radio button is available to the user rather than a drop-down list of numbers. Note that the system doesn't currently account for Participation Status (for example, 05-Cancelled); as such, if someone chooses this option and then cancels their registration, the system still counts their use of this Option Price. Also, this field is not evaluated when the Product Option Price is a promo code, which are limited to one use per transaction.
- Add to Group: if a Group is indicated here, the registrant is automatically added to the Group:
- If the Participant is already a current Group participant, they won't be added.
- If the Participant already exists in the Group but has a future End Date, they won't be added.
- If the Participant does not already exist in the Group, a Group Participant record is created with a start date of the date registered and no end date. They will be added with the Default Group Role assigned to the Group's Group Type.
- If the Participant exists but with a past End Date, a new Group Participant record is created with a start date of the date registered and no end date.
- If a Group Participant record is created, it will be added to the corresponding Event Participant record.
- Sort Order: if there is more than one Option Price, this field controls the order the Option Prices sort in relation to each other.
- Max Qty: Indicates the maximum times this option is allowed across all registrations within a single Event. Leave blank if unlimited spots are available. For example, if you indicate 10, this option can only be selected 10 times. Note: This will count the total number of times the Product Option Price is chosen, so if you have this set to 100 and the Qty Allowed field is set to 10, if all 10 of the first people to register choose ten Option Prices, the Option Price will no longer be available. Also note: if the individual invoice or participant status has been canceled, the Product Option Prices they have chosen will still count towards your total, see Cancelling an Event Participant for more information.
- Days Out to Hide: indicate the number of days out from the Event Start Date that you want this option to be hidden. For example, if you indicate 14, the option is no longer available starting two weeks before the Event Start Date. This works well with Promo Code for "early bird" discounts. Time is not considered when calculating the date to hide.
- Promo Code: indicate the code/phrase that would be entered to get the discount set in the option price field. For example, "STAFF50."
- Min Qty: indicate the minimum quantity allowed for this item at a certain price. For example, you have to buy at least 5 tickets to get the Option Price of $20/ticket, users would have a drop-down with options for 5, 6, etc. You will want to ensure that the Qty Allowed is higher than this number.
- Attending Online: When true, a Participant who selects this option during registration will have Attending Online = True on their Event Participant record. Because Participants who are attending online are not considered when evaluating whether to close event registration, consider these use tips:
- If your event will have only online attenders and doesn't have a no capacity limit, set Attending Online = True. Each Event Participant will have their Attending Online field set to True.
- If your event will have only online attenders and has a capacity limit, set Attending Online = False and add the capacity limit to the Participants Expected field on the Event record. All Participants will be considered when evaluating whether to close event registration. After the event has ended, you can update the Attending Online field on the Event Participant record (this would be a great time to use the Mass Assign button), if desired.
- If your event will have both online and in-person attenders with an in-person capacity limit, set Attending Online = True for the online registration option and add the in-person capacity limit to the Participants Expected field on the Event record. Only Participants who choose to attend in person will be considered when evaluating whether to close event registration.
