The following assumes you have already installed and tested your certificate.
All of these steps need to take place on the IIS Server that host MinistryPlatform. If your church is setup using multiple IIS servers, your exact steps will differ from this slightly.
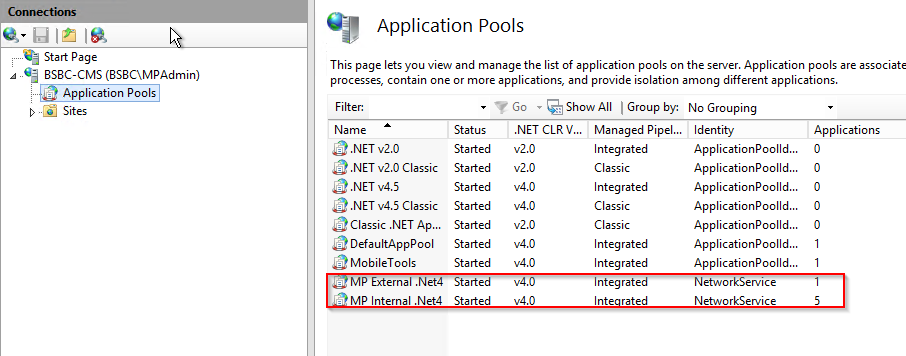
Before we can set the permissions on the Certificate Private Key, we need to ensure we know which user IIS is using to run MinsitryPlatform. To check this Launch IIS Manager > Application Pools
Find the MinistryPlatform Application Pools. Note the User Account that the application pool is running under. For most churches, it is Network Service, but for some, it is MPApp (or something similar).
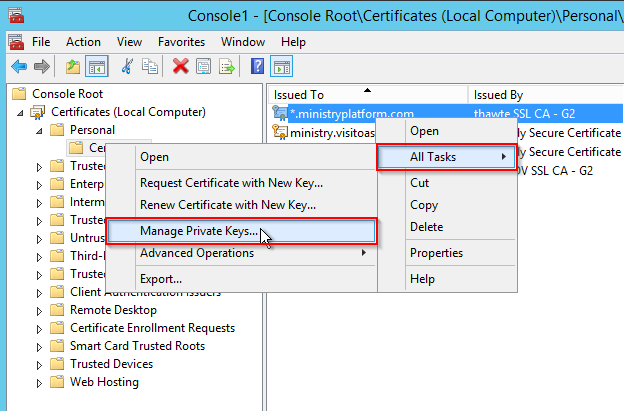
To Launch MCC with the Certificates Snap-In, see: Manage Certificates In MMC.
Locate the Certificate used to secure your website and Right Click > All Tasks > Manage Private Keys.
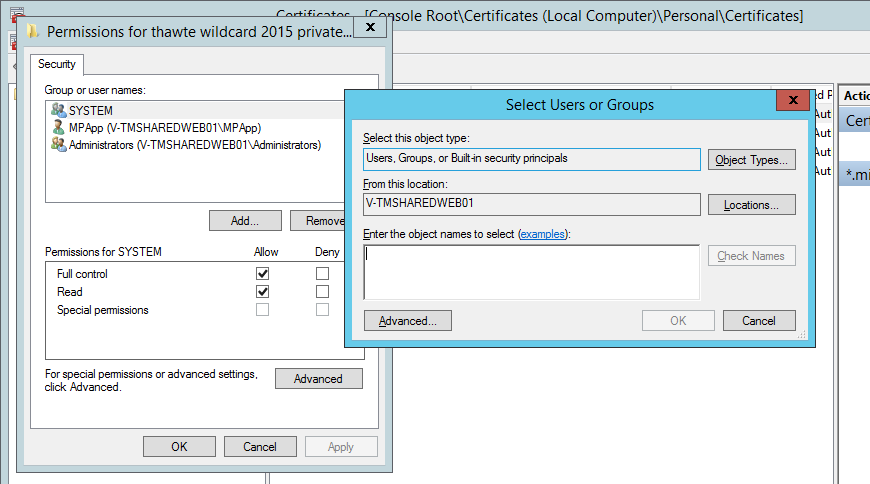
If the user you discovered in Step A.1 is not listed with Full Control, add that user and ensure that Full Control is checked:
If the Name does not resolve, you may have to use the Locations button to change where the dialog is searching for the name.
There is an additional hidden character at the beginning of the thumbprint. Make sure you remove this character. You may need to paste the value into notepad and recopy it.
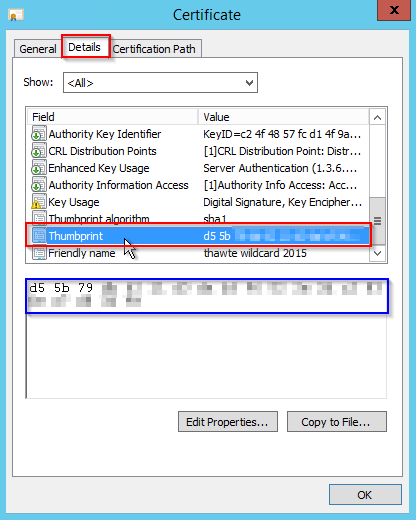
Use the thumbprint you copied in the previous section:
Check for question marks at the beginning of the thumbprint due to the hidden characters. Remove these if necessary.
If you can not open the platform, you can update the database directly like so:
UPDATE dp_Domains SET OAuth_Signing_Certificate_Thumbprint = '{thumbprint}' WHERE Domain_ID = 1Launch the Portal and Core Tools to ensure everything is still fully functional.
This is not a critical step, but a recommended one. Add one or more reminders to your calendar for 14, 30 and 60 days prior to your certificate expiring reminding you that it is expiring. Don't get caught without a valid SSL Cert. Not only is it a PCI violation, but it is not fun to change a certificate under pressure.
