![]() This Quick Start is intended to get NeedConnect up and running in as few steps as possible.
This Quick Start is intended to get NeedConnect up and running in as few steps as possible.
NeedConnect is a MinistryPlatform application that helps identify users with needs (Requesters) as well as users who can help provide assistance (Providers) and pair them in order to effectively serve the local community. NeedConnect lists various Need Types that are part of a Need Campaign. Requesters of needs will receive email confirmation at different steps throughout the process keeping them informed of the status of their need, while Providers of needs will receive access to a Connect Board allowing the user to find and assign themselves a need to fill. Likewise, Providers will receive email confirmations with various options throughout the process as well as reminders should their assignment remain incomplete. The church will ultimately manage the needs and define which areas of service they want to extend to their local community.
To set up NeedConnect, you will need to locate your Church's specific URL as well as setup various items in the Platform. This Quick Start guide outlines the initial items that the church will need to setup as well as help to create a big picture concept of the workflow process.
At install, all Administrator Users will have Full access to the Needs Management section in the Platform. To grant access to this section to other Users, we recommend creating two additional Security Roles and assigning them to the desired Users.
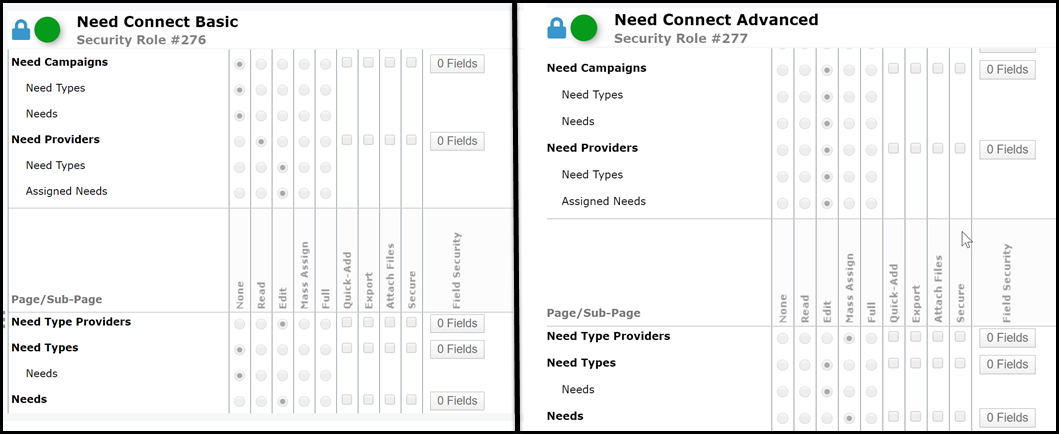
See: Page Permissions
The NeedConnect application displays Need Types and Needs organized by a Need Campaign. The active Need Campaign is whichever Campaign has the "Is_Default" field set to "True." The Title and Description of the Campaign appears at the top of the Connect Form.
A sample Need Campaign is provided at install. Add, edit, or delete as desired by going to Platform > Needs Management > Need Campaigns.
See: Campaign Setup
Need Types are presented on the Connect Form as the listing of needs to request help with or provide help for. Need Types are also how the Connect Board is organized.
Several sample Need Types are provided at install. Add, edit, or delete as desired by going to Platform > Needs Management > Need Types.
See: Need Types Setup
There are several email templates that should be customized in order to reflect your desired branding and language.
See: Email Templates.
Each church will need to decide what standards of approval Providers must meet. Providers must be approved by the church via the Platform in order to gain access to the Connect Board and have Needs assigned to them.
See: Provider Approval
Get the word out to your community!
See: Need Management
