Your Knowledge Base is moving on 3/25/24! Our new Help Center provides all the articles you know and love (plus so much more) in a one-stop shop. Ask your SPoC for details!

Customize

video it-directors
 
Check out the Widget Track of the 2022 MinistrySmart Conference to see Widget customization in real-time. Want help getting started with Widgets? Or someone to lend a hand in customization? Check out Juxt Marketing or Just Jesus Stuff for some developer assistance.

Basics

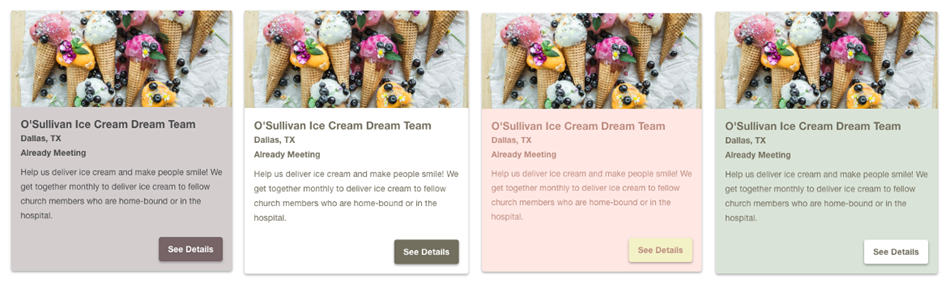
Widgets have a clean, minimal style intended to complement any church website. And customizing certain elements such as fonts and colors can further promote a seamless Widget experience. 

  • Widget customization assumes basic knowledge of CSS. Advanced skill set not required!
  • You can customization all of your Widgets using a single, universal CSS file for all of your Widgets. And you can customize on a Widget-by-Widget basis. The choice is yours!
  • Elements can be individually customized. All other elements will fall back to the default style sheet. It is not necessary (or recommended) to customize every element. 
  • MinistryPlatform server access is not required, but custom CSS files must be hosted in a referable location on a publicly accessible web server that supports SSL (https://).

Default Style Sheet

Widgets source their appearance from the mppw-widgetstyles.css style sheet. This resource can be viewed in a variety of locations depending on access and comfort level.

  • Inspect/Inspect Element (Recommend): The style sheet can be found by inspecting a page containing a Widget (steps vary by browser). Use your preferred browser's inspect tools to locate relevant classes and IDs for CSS customization.
  • Library: All Widgets source their content from the Widgets Library. You can get a copy of the un-minified CSS style sheet by appending /widgets/content/mppw-widgetstyles.css to your base MP URL. For example, if your MinistryPlatform URL is https://ministryplatform.com/mp, the base CSS would be found at https://ministryplatform.com/widgets/content/mppw-widgetstyles.css.
  • Server: The style sheet can be found under your MP server's path for Widgets. To determine the path, launch IIS (Internet Information Services), expand the site, right-click Widgets, and select Advanced Settings. Copy the Physical Path, and go to that location in your File Explorer. The style sheet is called mppw-widgetstyles.css.

Universal Style Sheets for All Widgets

Use the default style sheet to identify selectors for which you plan to assign a new value. Use your preferred application to list these selectors, along with declaring their new values, and save a new .css file under widgets\_DomainData\<host_name>\css\. Multiple style sheets are supported and will be loaded in alphabetical order. These style sheets will be applied to all of your Widgets and can be overridden by a custom style sheet for an individual Widget.

The built-in default style sheet is loaded first, then universal style sheets, then any custom style sheet specified in the Widget. Pro tip: After creating and saving your universal style sheets, refresh your app pool to see the changes applied to your Widgets.

Custom Style Sheet for Individual Widgets

Use the default style sheet to identify selectors for which you plan to assign a new value. Use your preferred application to list these selectors, along with declaring their new values, and save a new .css file.

This file must be secure and hosted in an accessible location. Note that custom files should only go in _DomainData\<host_name> so they will not be automatically removed during deployments. It will be referenced in Widget Configuration for the individual Widget(s) you want it to apply to.

Widget Configuration

Every Widget accepts the Custom CSS attribute. As with all attributes, it must be included before the opening Widget tag is closed. 

  • Attribute: customcss
  • Accepted Value: fully qualified URL
  • Example: customcss="https://ministryplatform.com/files/sample.css"

In the following example, custom CSS has been applied to the My Subscriptions Widget:

<mpp-subscriptions customcss="https://{your platform domain}/files/sample.css"></mpp-subscriptions>

Once you have updated a Widget with your custom style sheet, you can continue to edit the style sheet. If you make a change, refresh the page the Widget is on, to see how changes have taken effect.

Walkthrough

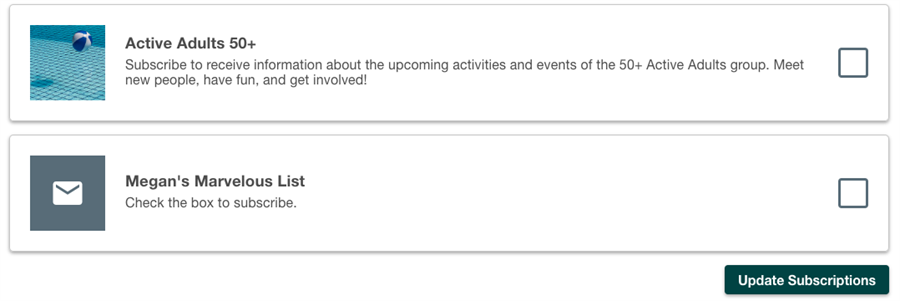
In the following example, a church has decided to update the button color in My Subscriptions:

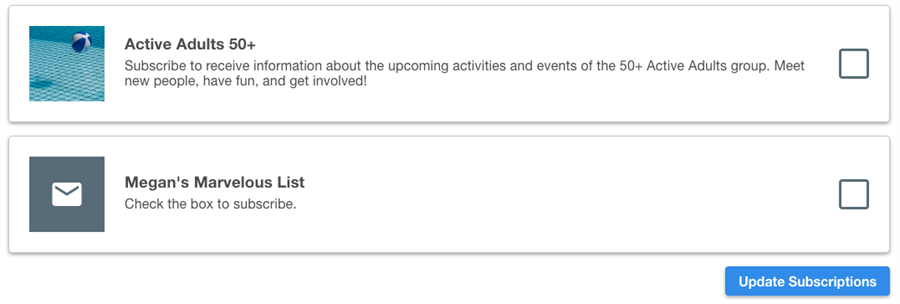
They plan to recolor buttons from the default blue to their preferred green.

Step-by-Step
  1. Use the default style sheet to identify the class selector controlling button color. In this example class selector ".mppw-btn" and property "background" have been identified. 
  2. Decide on a new color and express this color as a hex code. 
  3. Launch the preferred application and compose a new .css file with the following markup:
    .mppw-btn {
        background: #004c4c;
    }
  4. Save and host this file in a referable location. 
  5. Edit My Subscriptions Widget with the new attribute "customcss". The attribute's value should be a fully qualified URL pointing to the hosted file location, for example:
    <mpp-subscriptions customcss="https://ministryplatform.com/files/sample.css"></mpp-subscriptions>
  6. My Subscriptions now sources its button color from the custom attribute. All other elements are still sourced from the default style sheet:

If this church wanted to recolor buttons for their other Widgets, they could extend each Widget with the customcss attribute and point them to the same hosted .css file. 

But wait, there's more! How about an easy button?!?! Copy this CSS file—already organized with all available elements—to quickly make your desired changes!

Video: CSS Customization


Video: Group Image CSS Customization


Video: CSS Responsive Images