Basics
- The Add A Payment Tool allows Users to:
- Log any type of Payment for an existing Event registration.
- Apply a scholarship to an existing Event registration.
- Complete a new registration for someone who didn't use a registration process tied to MinistryPlatform (e.g. in person, on paper) and log their Payment.
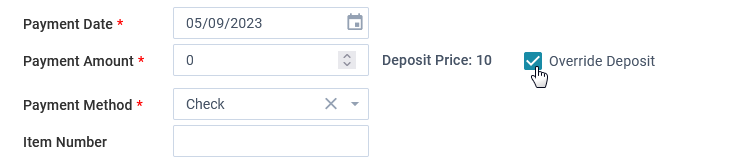
- The Tool can be used for Payments of any amount, up to the Total Amount Due (Base Price + Option Prices). If there is a Deposit Price, the initial payment may not be lower than the Deposit Amount. However, you may need to register someone and allow
them to pay later. In this case, you can select "Override Deposit" to change the Payment Amount to $0.
- The Tool does not:
- Reverse Payments or handle negative Payments. See Reversing Payments.
- Initiate or process electronic Payments (e.g. credit card, debit card).
- Add a Payment if there is no balance owed on the existing Invoice.
- An Online Registration Product needs to be associated with the Event record for data in the Tool to display.
- The Tool can be launched from any Page displaying Event records or from an open Event record. Pro tip: Searching for an Event within the Tool returns Events that have an Online Registration Product assigned and have a Start Date no
more than 30 days in the past.
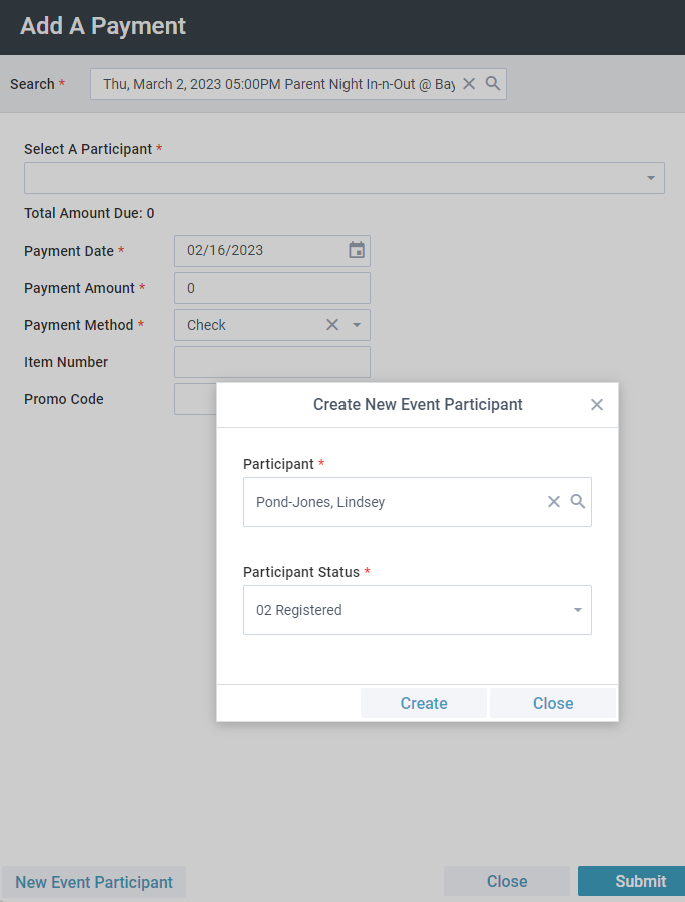
- If an individual isn't already related to the Event, you can add them as a New Event Participant within the Tool!
- Promo Codes can be applied within the Tool when making an initial payment, but they must first be set up under the Product associated with the Event.
- SPoCs can grant user access to the Tool via Security Roles and Tool Permissions.
- For the Tool to be successful, the Product of the Event and the Product associated with the Invoice Details for the Event Participant must match. There also must be a an Invoice Detail for the Base Price of the Product (an Invoice Detail record for
that Product/Event without the Invoice's Product Option Price being filled in).
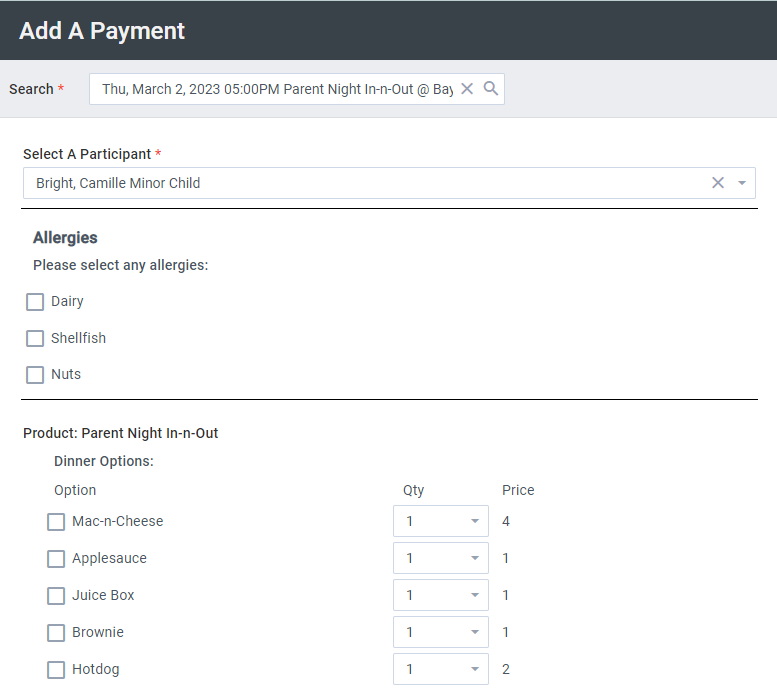
Example of the Tool after selecting an event and participant
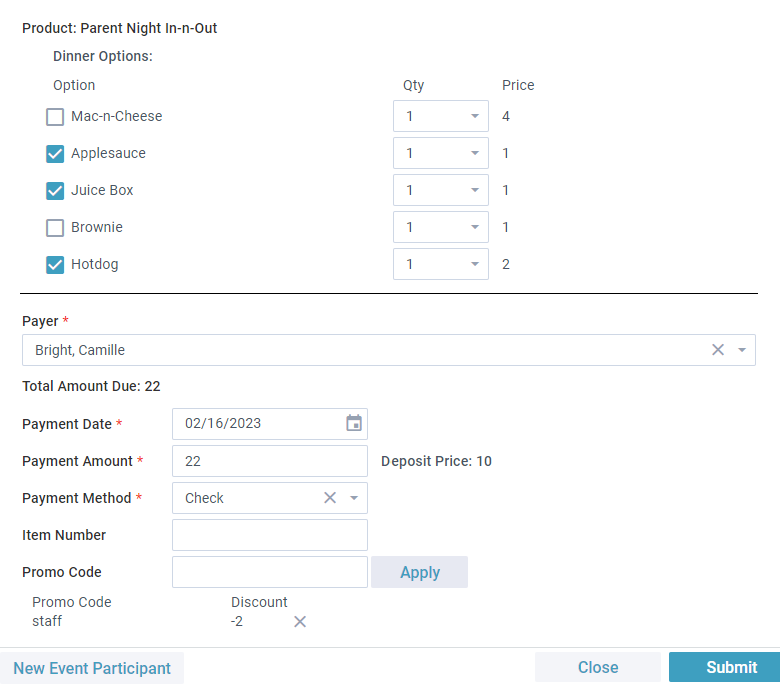
Example of the Tool with options selected and payment information entered
Example of overriding a deposit amount
Example of adding a new event participant within the Tool
Adding a Payment
- Launch the Tool by either:
- Going to a Page displaying Events > Tools > Add A Payment > search for and select the Event,
- Going to a Page displaying Events > make a selection of one Event record > Tools > Add a Payment, OR
- Going to a Page displaying Events > open the Event record > Tools > Add A Payment.
- Select the Event registrant from the Select A Participant drop-down list. OR, click New Event Participant to create a new record. (A new Event Participant must have an existing Participant record.)
- Complete the Registration Form, if needed. (If registration was previously completed, these fields will be read-only.)
- Required fields display with an asterisk (*).
- Fields that have been configured as hidden will be presented in the Tool.
- Fields with a Field Type of "File Upload" will not be presented in the Tool.
- Select any appropriate Option Prices and their quantities. (If registration was previously completed, these fields will be read-only.)
- Select the person responsible for making the Payment. (For scholarships, the Payment Method is typically Internal/Scholarships and the Payer is typically the church.)
- Enter the Payment details. (Payer and Payment details must be entered even if the event is free or the Tool is only being used to complete a registration form.)
- If you want to register the individual now and allow them to pay later, you can select Override Deposit to set the Payment Amount to $0.
- Enter any applicable Promo Code(s), and click Apply. (As Promo Code(s) are applied, the Total Amount Due is automatically reduced by the appropriate amount.)
- Promo Codes may only be applied for Event Participants who are registering for the first time and making their initial Payment. The option is not available under any other circumstances.
- As Promo Code(s) are successfully applied, the discounts are reflected in the Total Amount Due.
- When you're ready to submit the registration and/or add the Payment, click Submit.
If you registered a new individual and a Registration Form was assigned to the Event, a new Form Response record is created at this time, along with one Form Answer record for each completed Form Field. These are associated with the Event Participant
who was registered.
A new Invoice record, associated with the Payer, is also created at this time. One Invoice Detail record is created for the base Product, at minimum, and one for each selected Option Price (if any). These are associated with the Event Participant.
For either a new or existing Event Participant, a new Payment record, associated with the Payer, is created. This also creates new Payment Detail records, which are applied proportionally to any Invoice Details (in order of their creation) where the Line
Total has not yet been satisfied by previously applied Payments.
