When on any page, you take take a variety of actions, governed by Security roles.
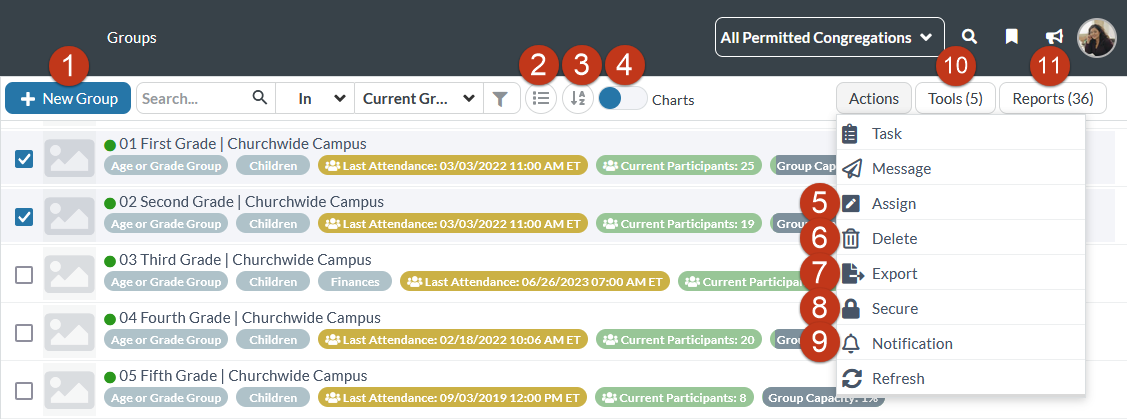
Clicking the plus sign creates one new record on that page. When you click New, you have access to the various record actions (for example, editing, copying, etc.). You won't see that plus sign on the Contacts page; instead, use the Add/Edit Family Tool to create a new Contact record.
Clicking the Layout drop-down allows you to change the Layout. We love the list view with its fat rows, but who can resist the grid? And that calendar view on the Events page is pretty great.
Clicking Sort will show the records in reverse order.
Clicking the Charts icon will toggle charts on and off.
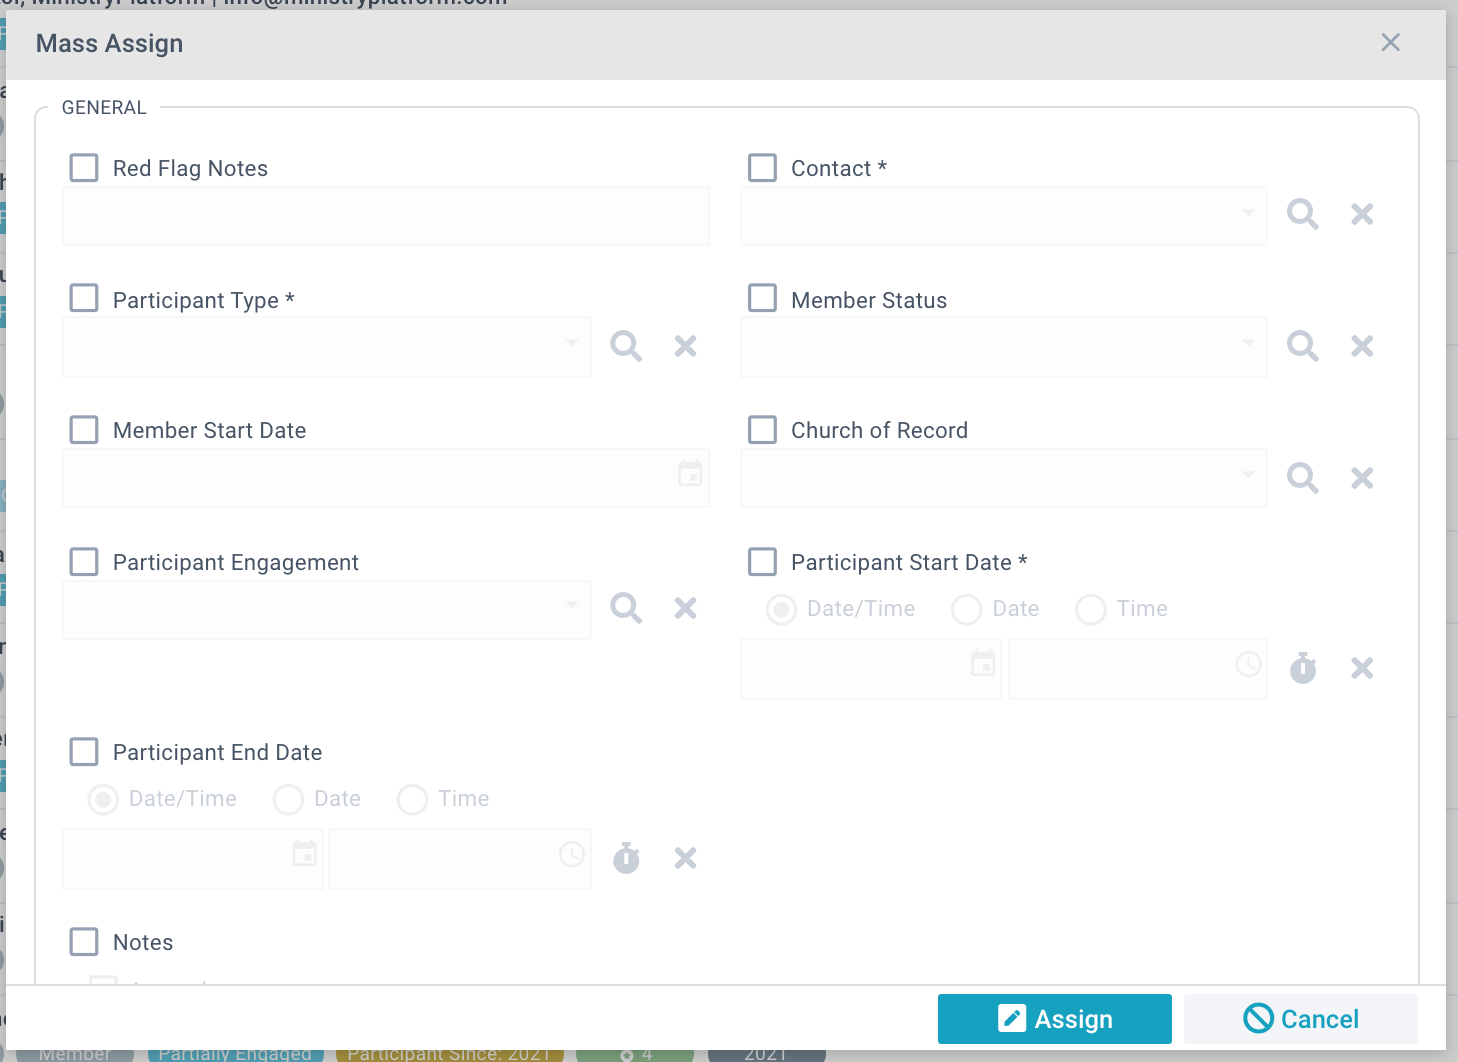
If you have a selection, you can use the Assign action to mass update specific fields in every record in that selection. This allows you to quickly change specific information on multiple records. This is an update action only; that is, it only changes data on records that already exist in the Platform. Custom fields are included as fields that can be updated in the Assign action.
To use the Assign action:
If you have a selection, you can use the Delete action to completely remove the records from the Platform. Important: Deleting a large selection and its affected records will cause your system to time-out. We recommend making smaller selections (less than 100,000 records including dependencies) for deletion. And remember, exercise extreme caution when using that all-powerful delete button.
Note that people records on the Contact or Participant pages should never be deleted; instead, we recommend using the Combine Contacts Tool (if there are duplicate records) or the Inactivate Tool (if they no longer attend your church).
To use the Delete action:
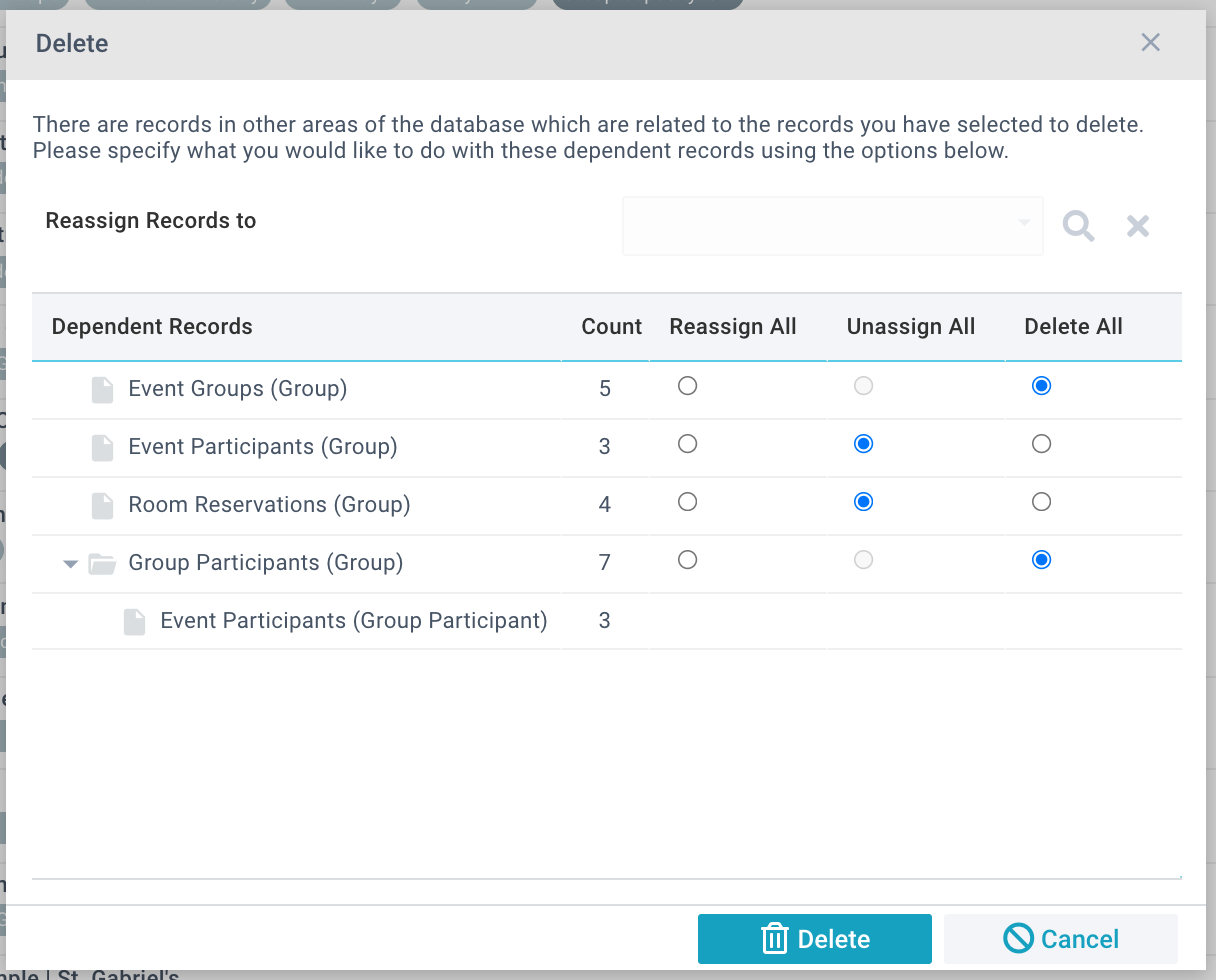
The Delete action is also available on records and sub-pages.
If you have a selection, you can use the Export action to use the information outside of MinistryPlatform. To export your selection, select Export from the Page Actions menu.
Next indicate your desired Export Options: Current View exports the columns in the current view and Selection Records exports the columns in the All Records view. Then choose your Output Format, and click Export. A file will download for your use.
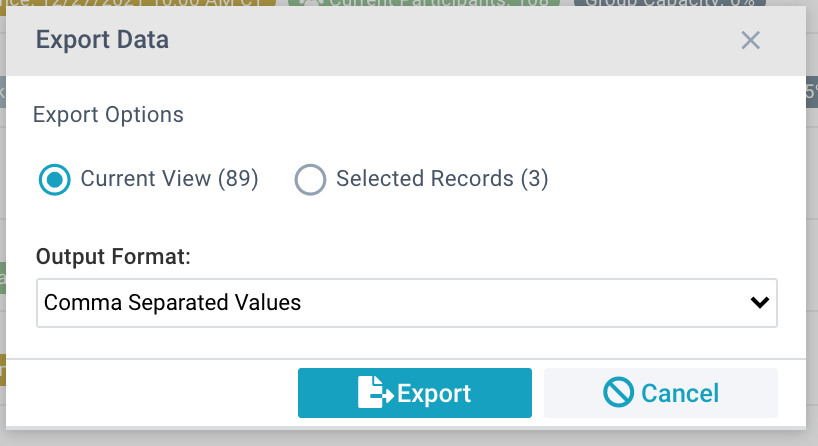
Note: The "Current View" option will be greyed out if the current view and the selected records are identical.
The format of the export is determined by the fields defined in the Page (All Records view) or the selected Page View. You may need to create a custom View to get the fields you need in your export if they do not exist in the Page field list or View you are using.
If you have a selection, you can secure the records. Check out record restrictions to learn more.
Clicking Notifications (the bell icon) will allow you to schedule notifications related to the current view.
Clicking Tools (the cute little wrench and screwdriver) gives you access to the Tools available on that page. Some of the tools require you to make a selection before using.
