The
following fields are available in System Setup > Page Views.
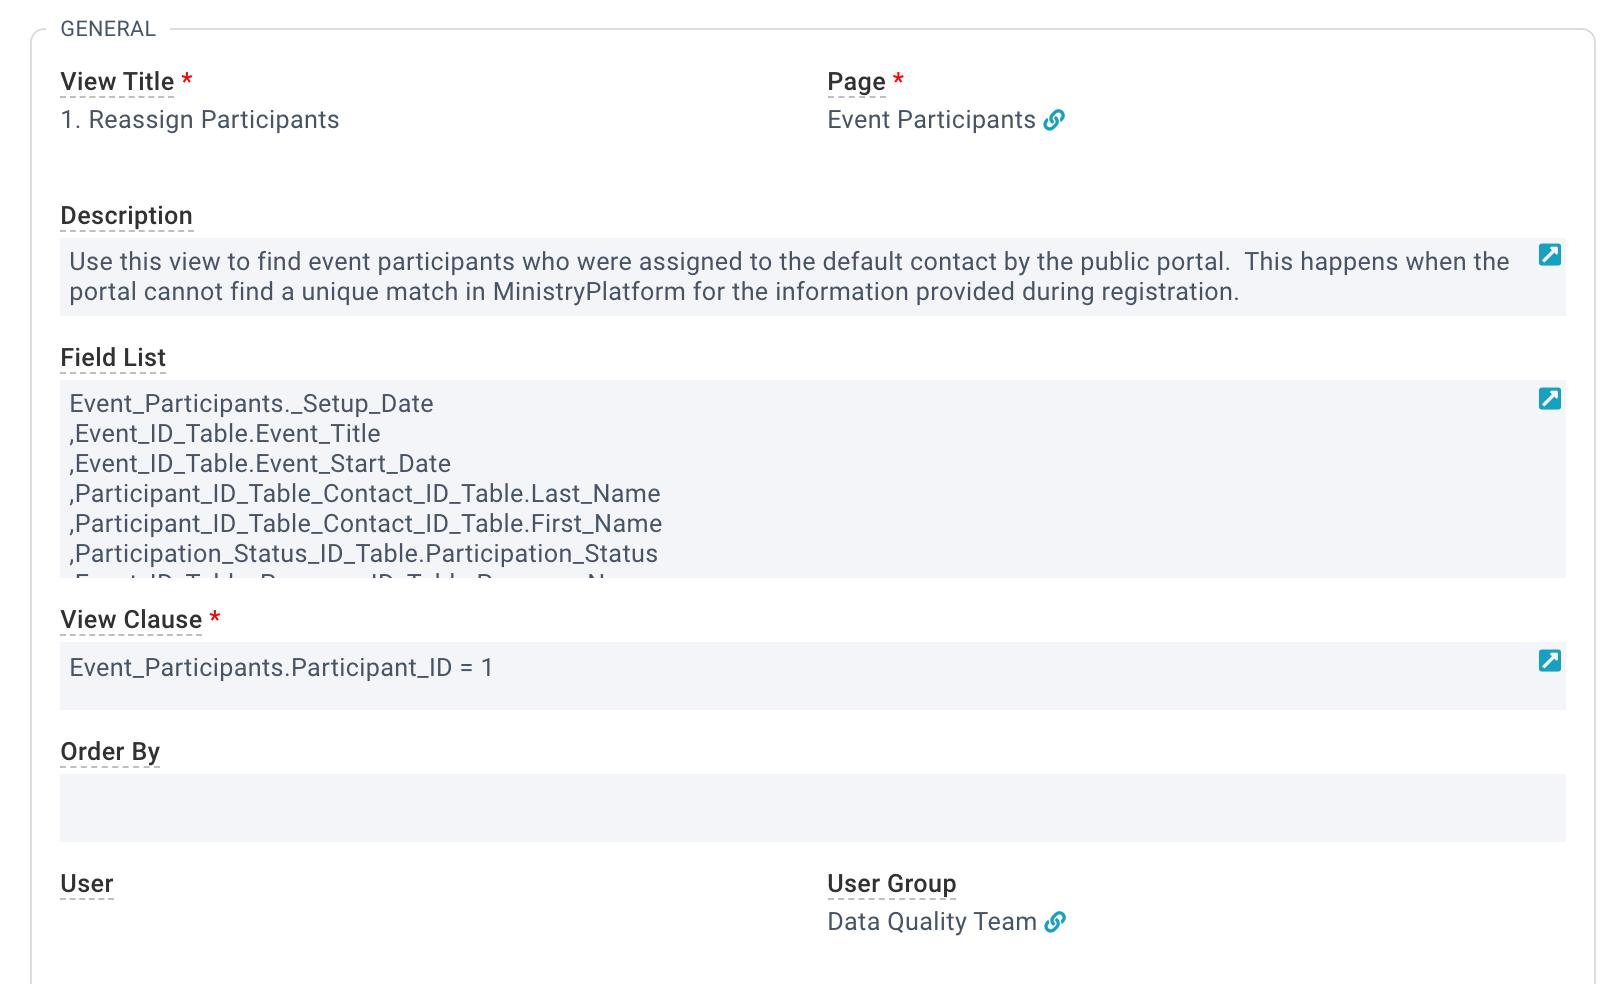
View Title: Title of the view; appears in page view drop-down.
Page: The page this view is associated with.
Description: Optional description.
Field List: List of fields. Leave this blank to use the defaults for the
Page.
View Clause: The SQL filter for the view. This is the WHERE clause without the "WHERE" keyword.
Order By: The SQL sort order. This is the ORDER BY clause without the "ORDER BY" keywords. The most efficient way to use this field is to use the field aliases used by your fields. The sort is the last thing applied by the
database engine, after all calculations have been made so a comma delimited list of field aliases will sort the results efficiently. To sort reverse-alphabetical or high-to-low, use the DESC keyword after the field alias or name.
User: If a User is listed, this a Personal View that is only available to that User.
User Group: If a User Group is selected, this is a Shared View, available to all members of the User Group.
Re-Using Page Fields
If there is an existing view on the same page that contains some or all the fields you want in your view, you can leverage the field list already started.
If you have access to the view because it is a System View or you are part of the User Group:
- Find the Page with the view you'd like to copy
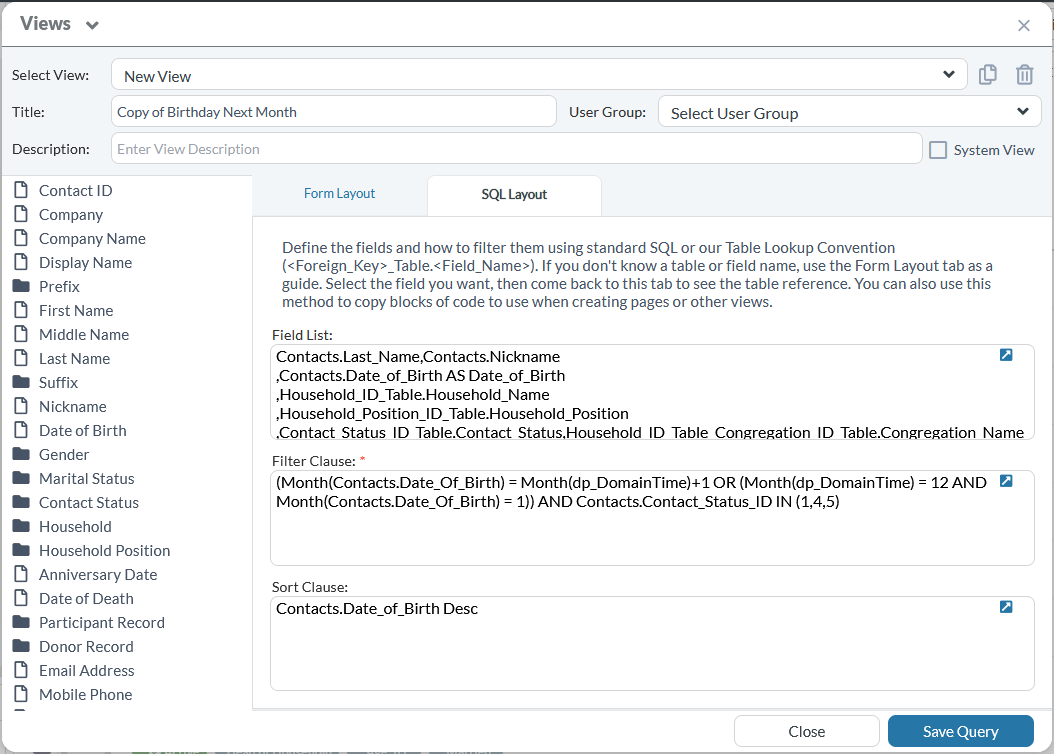
- Open the Advanced Search Tool
- Select the View you'd like to copy for the View drop-down list. Note: Users will have access to their own views, System Views, and views shared with a User Group they are in.
- Personal views
will be marked with a star. When the personal view is selected, it will be opened in edit mode. It can be edited, deleted, or copied.
- Shared or
System View can be copied by ...
- Selecting the view
- Selecting copy
- "Copy of" will be added to the beginning of the view's title and the copied view will be opened directly in SQL Layout
- Rename the view
- Edit as desired
- Save
Note: All of your Users will be able to access, but not edit, System Views. If a User edits a System View, a copy will be created, leaving the original View intact for all Users while allowing for additional customizations
to the new View.
- Have a SPoC copy the entire view to create a new view and make you the User so you can further edit.
- System Setup > Page Views
- Open the desired View record
- Click Copy
- Click Edit
- Change the User and/or User Group
- Click Save. Note: Not all views created are able to be edited via the advanced view tool - if the view includes certain SQL logic the view must only be edited in the system setup area.
- Have a SPoC copy the desired fields from the view and paste them into your view.
- System Setup > Page Views
- Open the desired View record
- Click Edit
- In the field list, copy the desired fields
- Click Cancel
- Click Close
- Open the other View record
- Click Edit
- In the field list, paste the copied field (make sure they are in the desired order and separated by a comma).
- Click Save. Note: If the view you want to add fields to, have no other fields in the "Field List" field, you may need to copy all of the fields from the appropriate page on the Pages page. To do this:
- System Setup > Pages
- Open the desired Page
- Click Edit
- In the Default Fields, copy the appropriate fields (usually all of them)
- Click Cancel
- Open the view record
- In the field list, paste the copied fields (make sure they are in the desired order and separated by a comma)
- Click Save
