Your Knowledge Base has moved to the new Help Center. Check
out the release notes for details. And don't forget to update your bookmarks and in-house documentation before May 28.
The Portal allows you to view any Custom Form created in MinistryPlatform.
For standalone forms, the form-specific URL allows users to complete and submit the specific desired Custom Form.
Custom Forms can also be integrated with other Portal pages such as Event registrations, My Calls, Mission Trip registrations and Opportunities. If the form is integrated with these pages, creating a form-specific URL is not necessary; instead, indicate the appropriate Custom Form in the field provided when you make the applicable Event, Pledge Campaign or Opportunity record. But, if desired, you could use the form-specific URL to preview your Custom Form before associating it with the Event, Pledge Campaign or Opportunity review. Once you have integrated your Custom Form with another page, reloading configuration settings on the portal admin page may be necessary.
If you prefer to create a form-specific URL that automatically logs people into their Portal account, you can do so by following these instructions.
Creating a Form-specific Url
Method 1: Form and Customer Specific Url (auto-login)
Use the Auto Login Generator to create a custom link which also logs in a User. Requires a Contact GUID.
Method 2: Form Specific Url
In the Platform, create a Custom Form and add desired Fields.
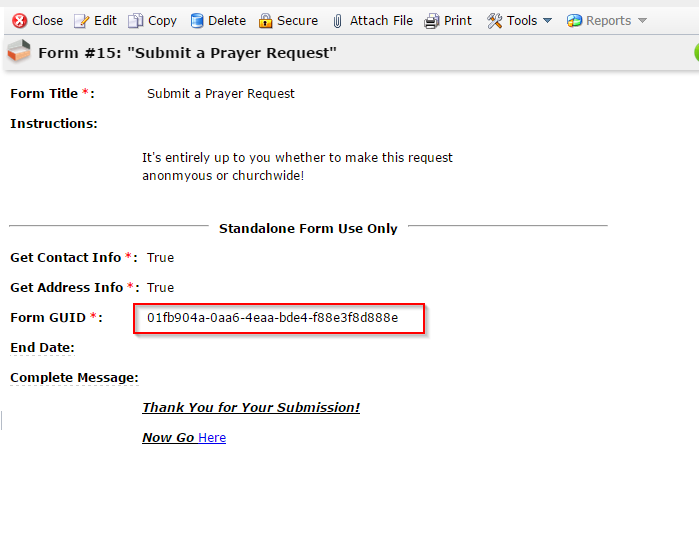
In the Custom Form record, copy the Form GUID value (see below).
In a web browser, append the Form GUID to this url where <your_domain> is replaced with your domain: https://<your_domain>/portal/get_form.aspx?id=<form_guid>
For example: https://my.thinkministry.com/portal/get_form.aspx?id=607e7d60-3af3-45c9-b677-7e76121aee93
Form submissions can be submitted as soon as you provide the URL to people (e.g., via email, your website, etc.)
When autocomplete results are available use up and down arrows to review and enter to select.