A SPoC must place the navigation link to My Mission Trip (my_mission_trips.aspx) in the desired place on your Portal skin. If desired, you can also place the link on your church website.
Additionally, a SPoC must go to Administration > Configuration Settings to update the following Configuration Settings. Remember to use the Portal Admin page to reload the Configuration Settings if you don't want to wait for them to take effect.
For a mission trip to appear on the My Mission Trips page, create the appropriate Pledge Campaign(s) in MinistryPlatform. When doing so, ensure the following fields are set as desired.
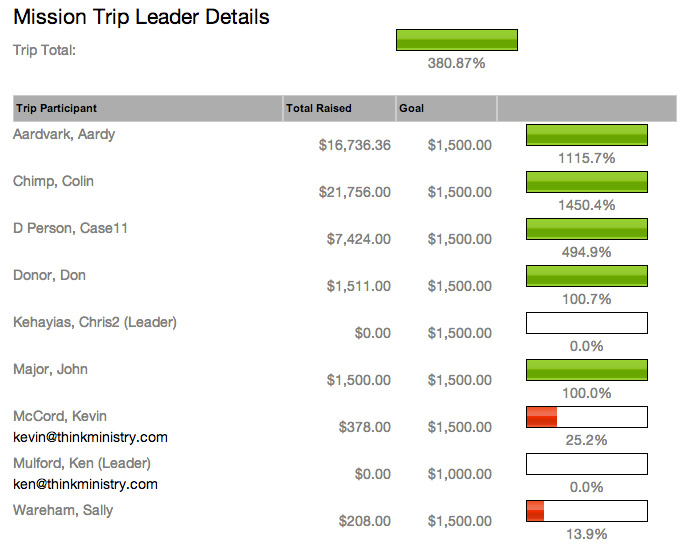
Once the Pledge Campaign is setup, add trip participants in the Pledges sub-page of the Pledge Campaign. Anyone indicated here has access to the trip in My Mission Trips so long as their Pledge Status is Active or Completed. Additionally, anyone indicated as a Trip Leader can see all trip participants' fundraising progress for that specific trip.
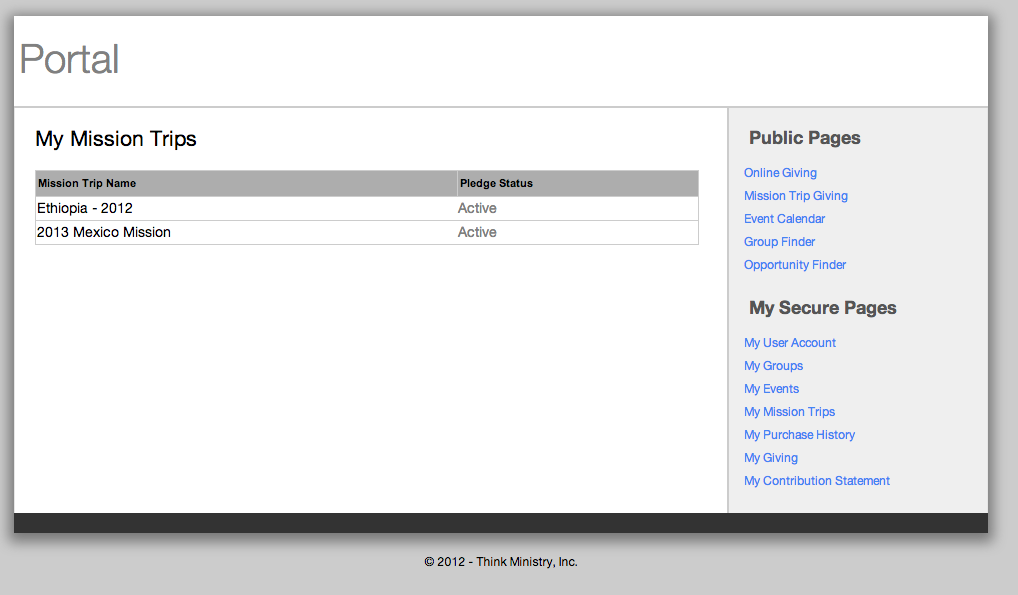
Upon logging in, trip participants are provided a list of mission trips they are participating in. The trips are ordered Event Date descending.
Upon clicking a mission trip name, trip participants can see their overall progress.
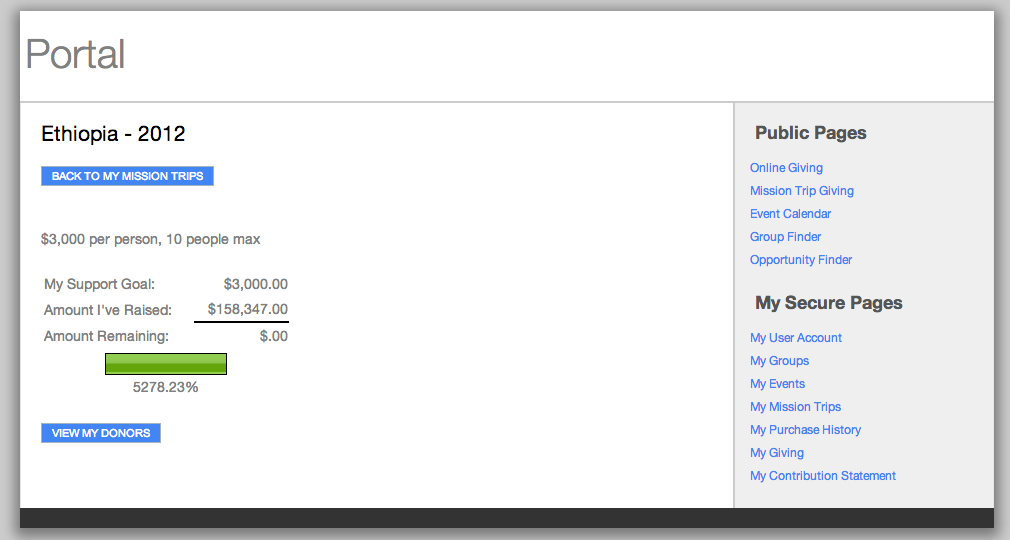
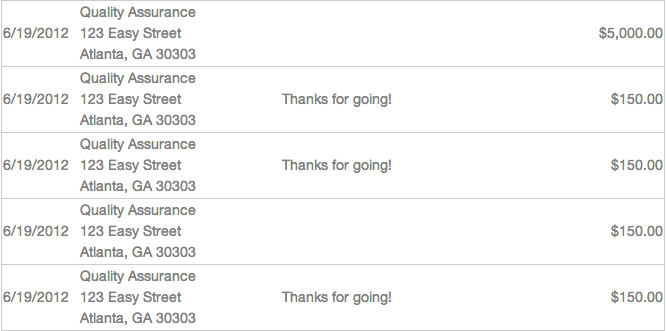
If your configuration settings allow, trip participants can click View My Donors to see donation amounts and/or donor names and addresses.
Individuals whose Pledge record is Trip Leader=True can see the information indicated above, as well as a summary of all trip participant fundraising progress.