Your Knowledge Base has moved to the new Help Center.  Check out the release notes for details. And don't forget to update your bookmarks and in-house documentation before May 28.

Configuring Plan Your Visit


Quick Start

Want to get the Plan Your Visit Widget up and running ASAP? Check out the Quick Start Guide

If the shared script hasn't been added to your website, add it to your desired webpage. Be sure to replace "{your platform domain}" in the following code with your church's base MP URL.

<script id="MPWidgets" src="https://{your platform domain}/widgets/dist/MPWidgets.js"></script>

Create a webpage on your website that will display your Plan your Visit Widget or identify the page on your website where it will be displayed.

Add the Plan Your Visit Widget to your church website by placing this snippet of code in the body of your chosen webpage.

<mpp-plan-your-visit returnurl="https://yoursite.com/visit" 
    verificationemailtemplateid="141" 
    churchnotificationemailtemplateid="1" 
    milestonetoassignid="15" 
    milestoneprogramid="5" 
    collectaddress="true"></mpp-plan-your-visit>
Tip: While not mandatory, this snippet would typically be placed inside a <div> element with the class "container."

Widget Configuration

Required attributes are necessary for Widgets to function

  • Return URL: Defines the navigation path to the Plan Your Visit Widget. Used by verification email to resume Plan Your Visit. This is the URL for the page where the Plan Your Visit Widget is placed.
    • Attribute: returnurl 
    • Valid Value: fully qualified URL
returnurl="https://yoursite.com/visit"
  • Verification Email Template: Email containing a validation link allowing an individual to proceed. 
    • Attribute: verificationemailtemplateid
    • Valid Value: Message ID
verificationemailtemplateid="141"
  • Church Notification Template: Email notifying a designated point of contact (see, Plan Your Visit User below). 
    • Attribute: churchnotificationemailtemplateid
    • Valid Value: Message ID
churchnotificationemailtemplateid="1"
  • Show/Hide Address: Determines whether the form will require an address. When disabled, these fields are hidden. 
    • ​Attribute: collectaddress
    • Valid Value: true or false
collectaddress="true"
  • Milestone to Assign: Designates which Milestone will be assigned to those who plan their visit. 
    • Attribute: milestonetoassignid
    • Valid Value: Milestone ID
milestonetoassignid="15"
  • Milestone Program: Determines which Program will be credited in the Milestone Assigned record. 
    • Attribute: milestoneprogramid
    • Valid Value: Program ID
milestoneprogramid="5"

Attributes must be included before the opening Widget tag is closed. An attribute's value should be wrapped in quote marks.

Configure Your Widget!

Simply fill out the Widget Configurator below, copy your generated Widget, and paste it into your website. 

Update Configuration Parameters

Setting Name
My Value
Description

Preview & Copy

Platform Configuration

Milestone: Create or update the Milestone that should be assigned when form is completed. 

Program: Create or update the Program that will be credited when the Milestone is assigned. 

Participant: Review Configuration Setting COMMON,defaultParticipantType. This value will be assigned to Participant Records created by this Widget.

Group: Ensure desired Groups are configured for Group Type "Age and Grade Group." Groups that have this Group Type and meet all of the following criteria will be available for pre-registering children:

  • Today's date is less than the End Date or the End Date is undefined. 
  • Available Online is set to "True."
  • Target Size (if defined) has not been reached. 
  • Note: Age and Grade Groups associated with the selected Congregation and the churchwide Congregation will be displayed.

Congregation

  • Designate a "Plan a Visit User" for each Congregation Record. These Users will be notified with the Message configured in the attribute "Church Notification Template." 
  • Designate a "Plan a Visit Template" for each Congregation Record. This Message will be sent to anyone who completes the Plan Your Visit form. This Message can be tailored to each Campus. Note: If you don't designate a "Plan a Visit Template" for each Congregation Record, you'll receive error notifications.

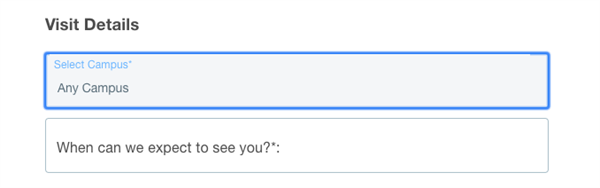
The Congregation Record for values "Plan a Visit User" and "Plan a Visit Template" is determined by which Campus a visitor selects.

Messages: Messages sent by the Plan Your Visit Widget are completely customizable! But to support the workflow, certain tokens must be incorporated into the  Messages. See required and optional tokens for the three relevant messages below. 

  • Verification Email Template: Plan Your Visit is a two-step Widget and this Message requires a verification token for visitors to continue the form. No records have been created for this User in the Platform, so Contact Merge Fields are not available. This Message can be personalized using the optional tokens below. 
    • Required: Token [mpp_verify_email_url] should be set as the value of a link somewhere in this Message. This link should be set from source view. The link text displayed might be "click here" or "verify."
    • Optional: Tokens [mpp_contact_first_name] and [mpp_contact_last_name] will merge in the "First Name" and "Last Name" values provided on the form. 
<div>please continue to plan your visit by choosing <a href="[mpp_verify_email_url]">verify</a></div>
  • Church Notification Template: This Message is sent to the "Plan Your Visit User" specified for a Congregation. Contact Merge Fields are supported for the recipient. This Message also supports information provided by the visitor using the optional tokens below.
    • Optional: Tokens [mpp_contact_first_name], [mpp_contact_last_name], and [mpp_when_to_expect_you] will merge in the "First Name", "Last Name" and "When can we expect to see you" values respectively. 
  • Plan a Visit Template: This Message is sent after all records are created for this Visitor and supports standard Contact Merge Fields. This Message should be configured for each Campus on the corresponding Congregation Record. 
Note: The Plan Your Visit Email Templates use a Message ID, not a Template ID. Similar names, but very different things ;)

Customization

Want to customize the Plan Your Visit Widget even more? We love that

CSS: Every Widget accepts the Custom CSS attribute. Include it before the opening Widget tag is closed and customize backgrounds, button colors, and more!

Application Labels: Call them Congregations or Sites instead of Campuses? Have services on Saturdays AND Sundays?No problem! You can change the text that appears on the buttons by navigating to System Setup > Application Labels (note that churches are responsible for all translations if the default is not used).

  • mpp-plan-your-visit.congregationLabel - Label for the Congregation a visitor plans to attend. The default is "Select Campus."
  • mpp-plan-your-visit.congregationPlaceHolderText - Label for the drop-down value prompting Congregation selection. The default is "Select Campus."
  • mpp-plan-your-visit.verificationDescription - Text shown when requesting information from a first time visitor. The default is "We are looking forward to meeting you on your first Sunday. Please fill out the information below so that we can make your experience special."