GroupLife provides a way for participants to RSVP for a group activity, such as an event or meeting. This lets group leaders know whether you plan to attend so they can prepare for the activity accordingly.
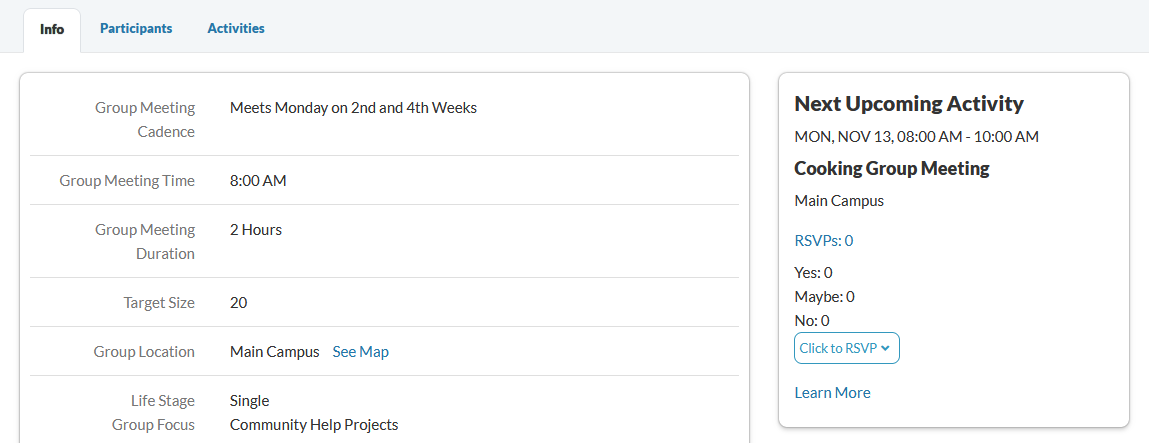
There are two places where you can RSVP for an upcoming activity: on the Info tab where the Next Upcoming Activity displays, or on the Activities tab.
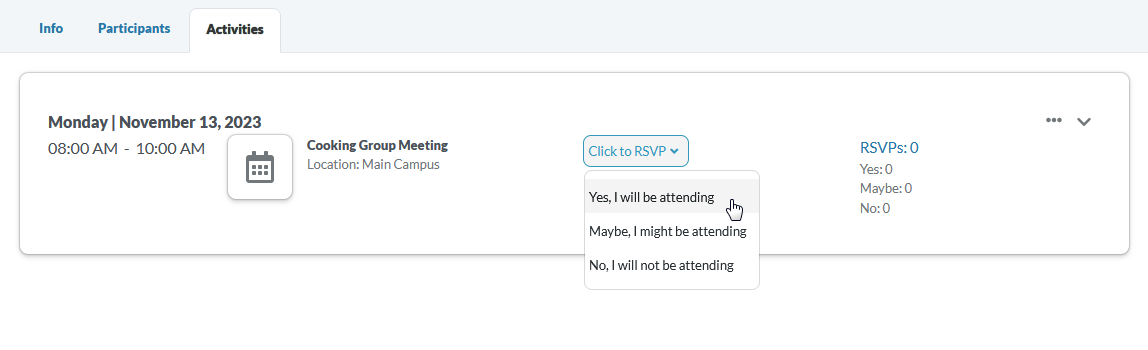
You can select one of the following options for the event:
Your selection is saved automatically.
If you need to update your RSVP before the activity's start date, you can come back to this page and change the option in the drop-down menu.
Want to see group activities in your own calendar application (like Google Calendar or Microsoft Outlook)? You can download an ICS file that contains all the information for an activity. Then, you can upload the file into your calendar application, and the activity will display.
An ICS file is saved in your Downloads folder. Go to your calendar application, and upload the ICS file. For more information on how to do this, consult the help documentation for your calendar application.
